pattern release

Spring 1

I'm wearing a textured cowl in blues/greens and politely tipping a sunhat to the viewer

Hello from farmer Laur!

First, I have no idea how I missed this gradient club the first time KnitCircus posted it, but when they re-released it for non-club members I knew I had to jump on it immediately. I’ve put way too many hours into Stardew Valley to not try to design something with a game-inspired gradient!

As per usual, my initial concepts were all way too literal, trying to find stitch patterns that would look exactly like something in the game. Eventually, I came around to the concept of the growing crops, but with more fanciful interpretations.

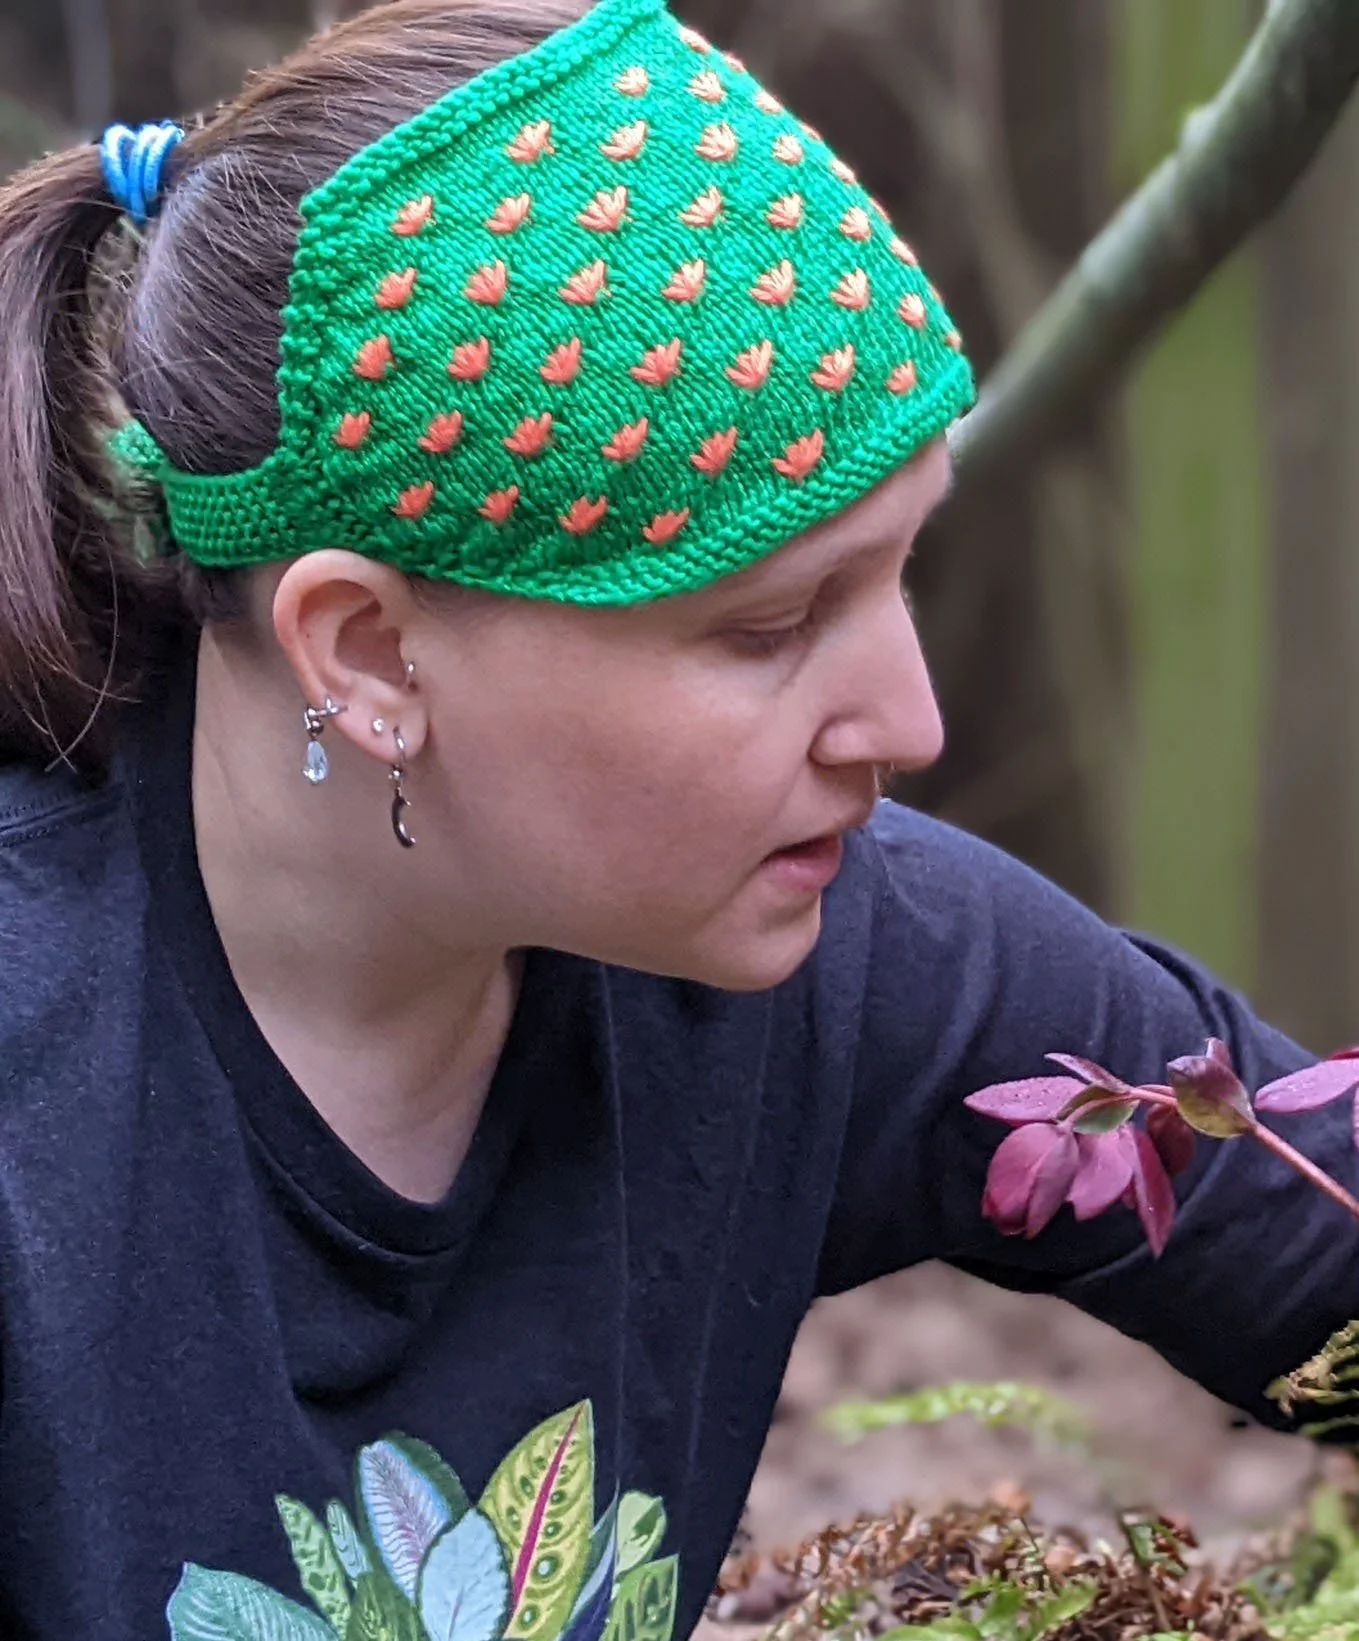
The growing sections start with seeds, in the form of raindrop stitch. It’s a bobble that isn’t a bobble! I really hate having to turn my work a billion times and end with p5tog or something equally odious, so I’m in love with this sweet little stitch that gets that same bobble texture without too much work. That said, I did slightly modify the stitch for my purposes, so I made a tutorial!

The textured cowl laid out on a tree branch so you can see the distinct patterning sections

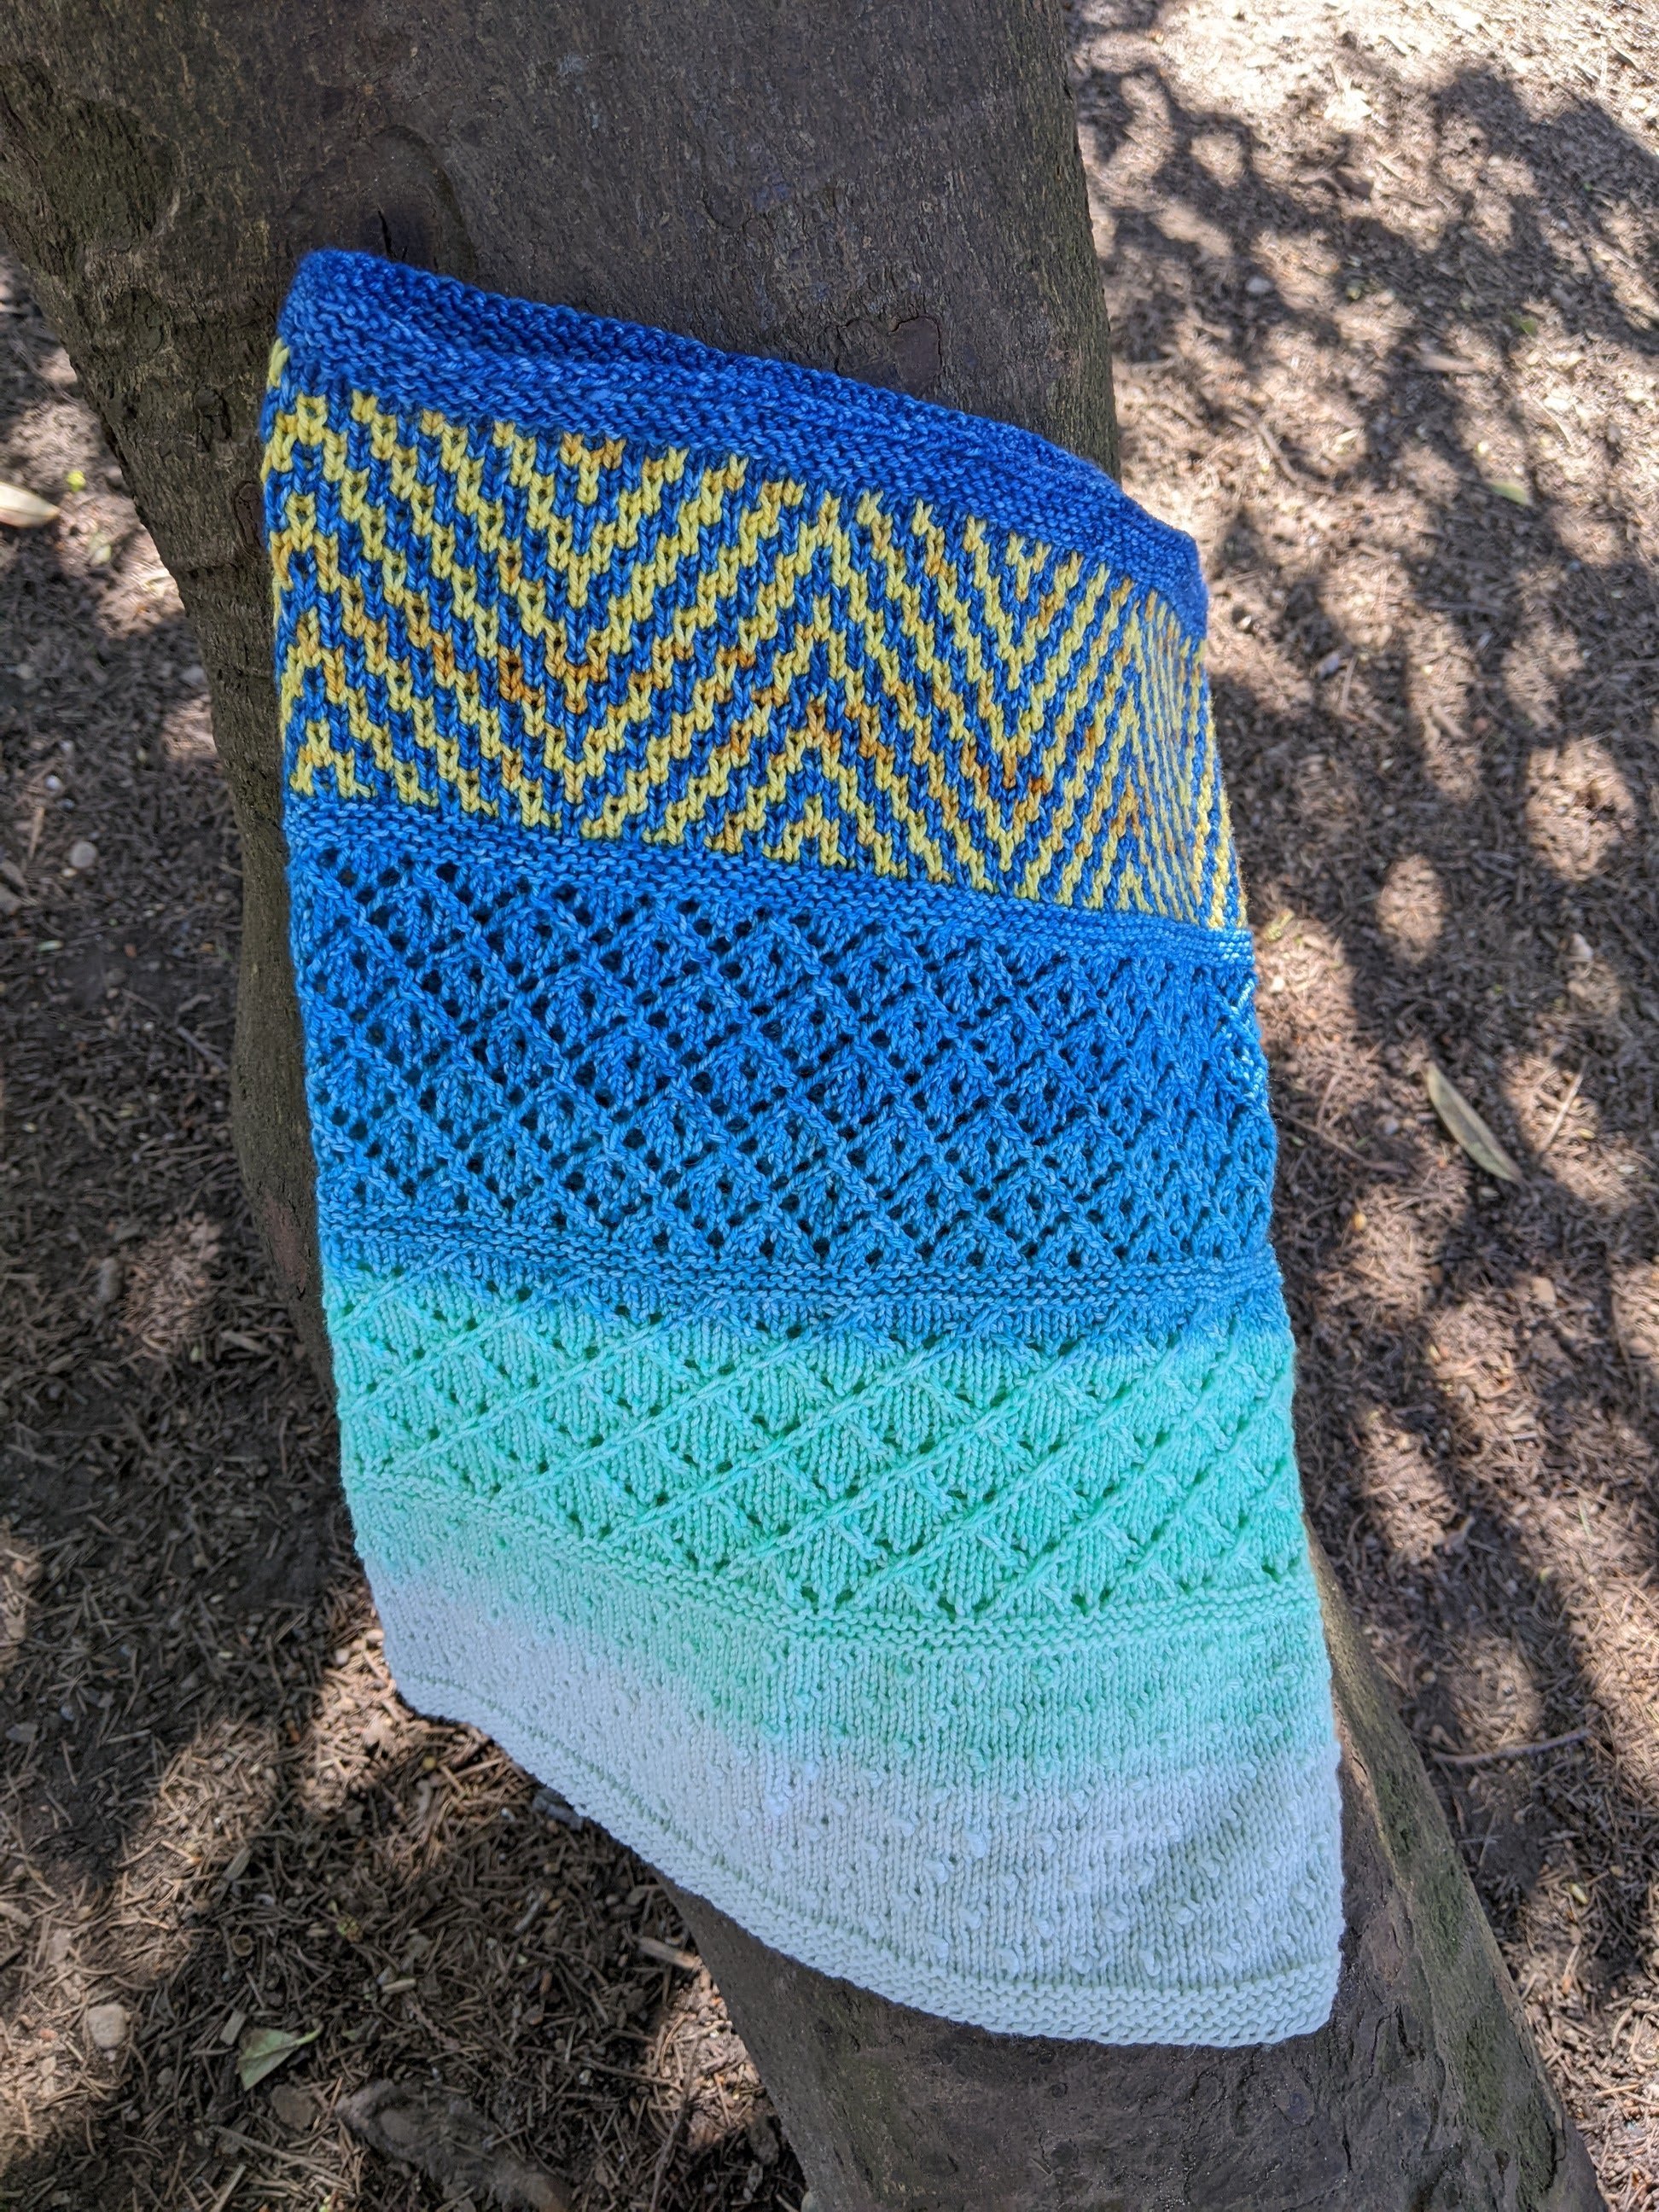
Sections from bottom to top: seeds, sprouts, crops, mosaic

The second growing section represents the sprouts of the plant, so it’s some simple lace in a vaguely grid shape. Of course, in knitting we love diamond grids over square ones, so diamond lace it is!

The final growing section is fully-grown crops, so more diamond lace, but make it fancy. I had a devil of a time making the chart for this section - I first modified a flat stitch for in-the-round knitting (not usually that difficult, but can be tricky if you have decreases that cross the BOR marker). Then, I had to make a lace chart that would represent what was happening, which is way harder than I thought it would be! It’s important to me to provide both written and charter instructions for knitters, but I admit this section made me want to abandon charts. I knew how to say what I wanted to happen, but it took many iterations (and lots of help from my tech editor snooptiggercrafts <3) to finally get a chart that would accomplish the same thing.

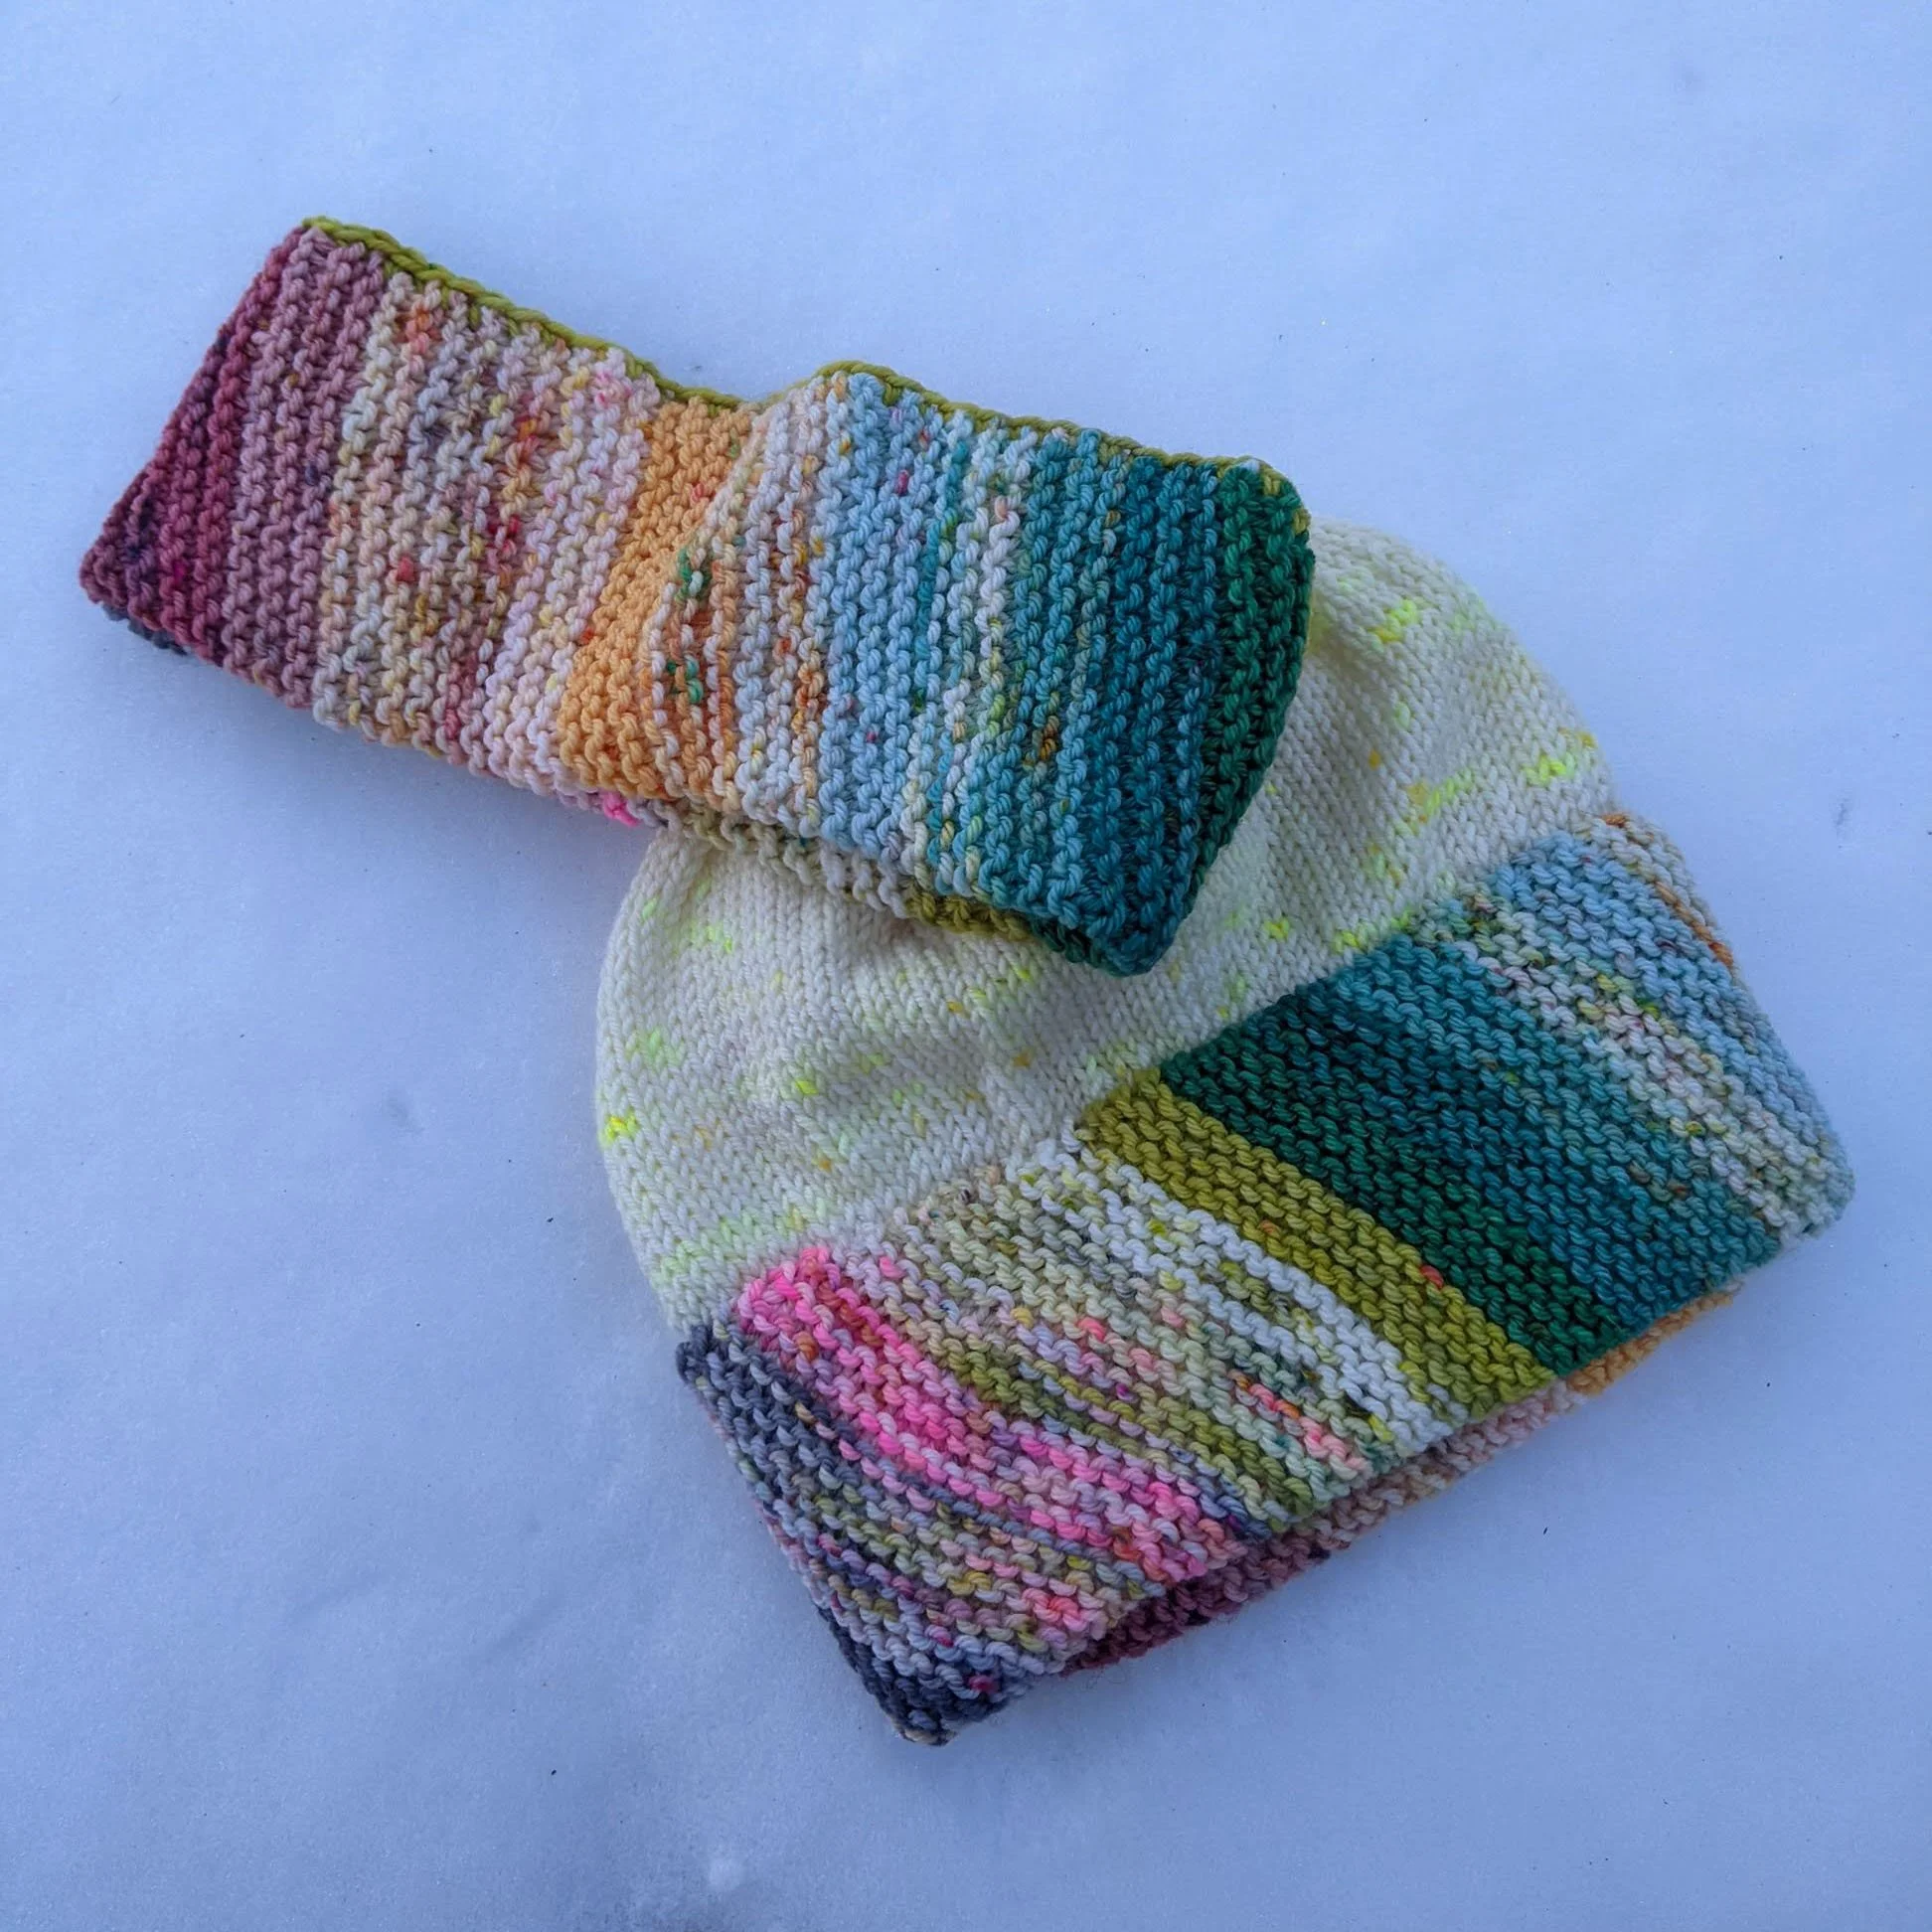
Lastly! The cheerful mosaic section representing the Stardew Valley logo. I know I say this all the time, but mosaic is the literal greatest. If you haven’t yet tried mosaic knitting, please do! It’s just knitting and slipping, no really complicated colorwork (aside from paying attention to where to knit and slip).

After finish the cowl, I still had a bit of yarn left, but realized i had gone over 100g on the MC part. I shortened the seeds section slightly, which not only uses less yarn but has the added benefit of matching the lacy sections in height (since in order to stretch them to the right width, they have to lose height).

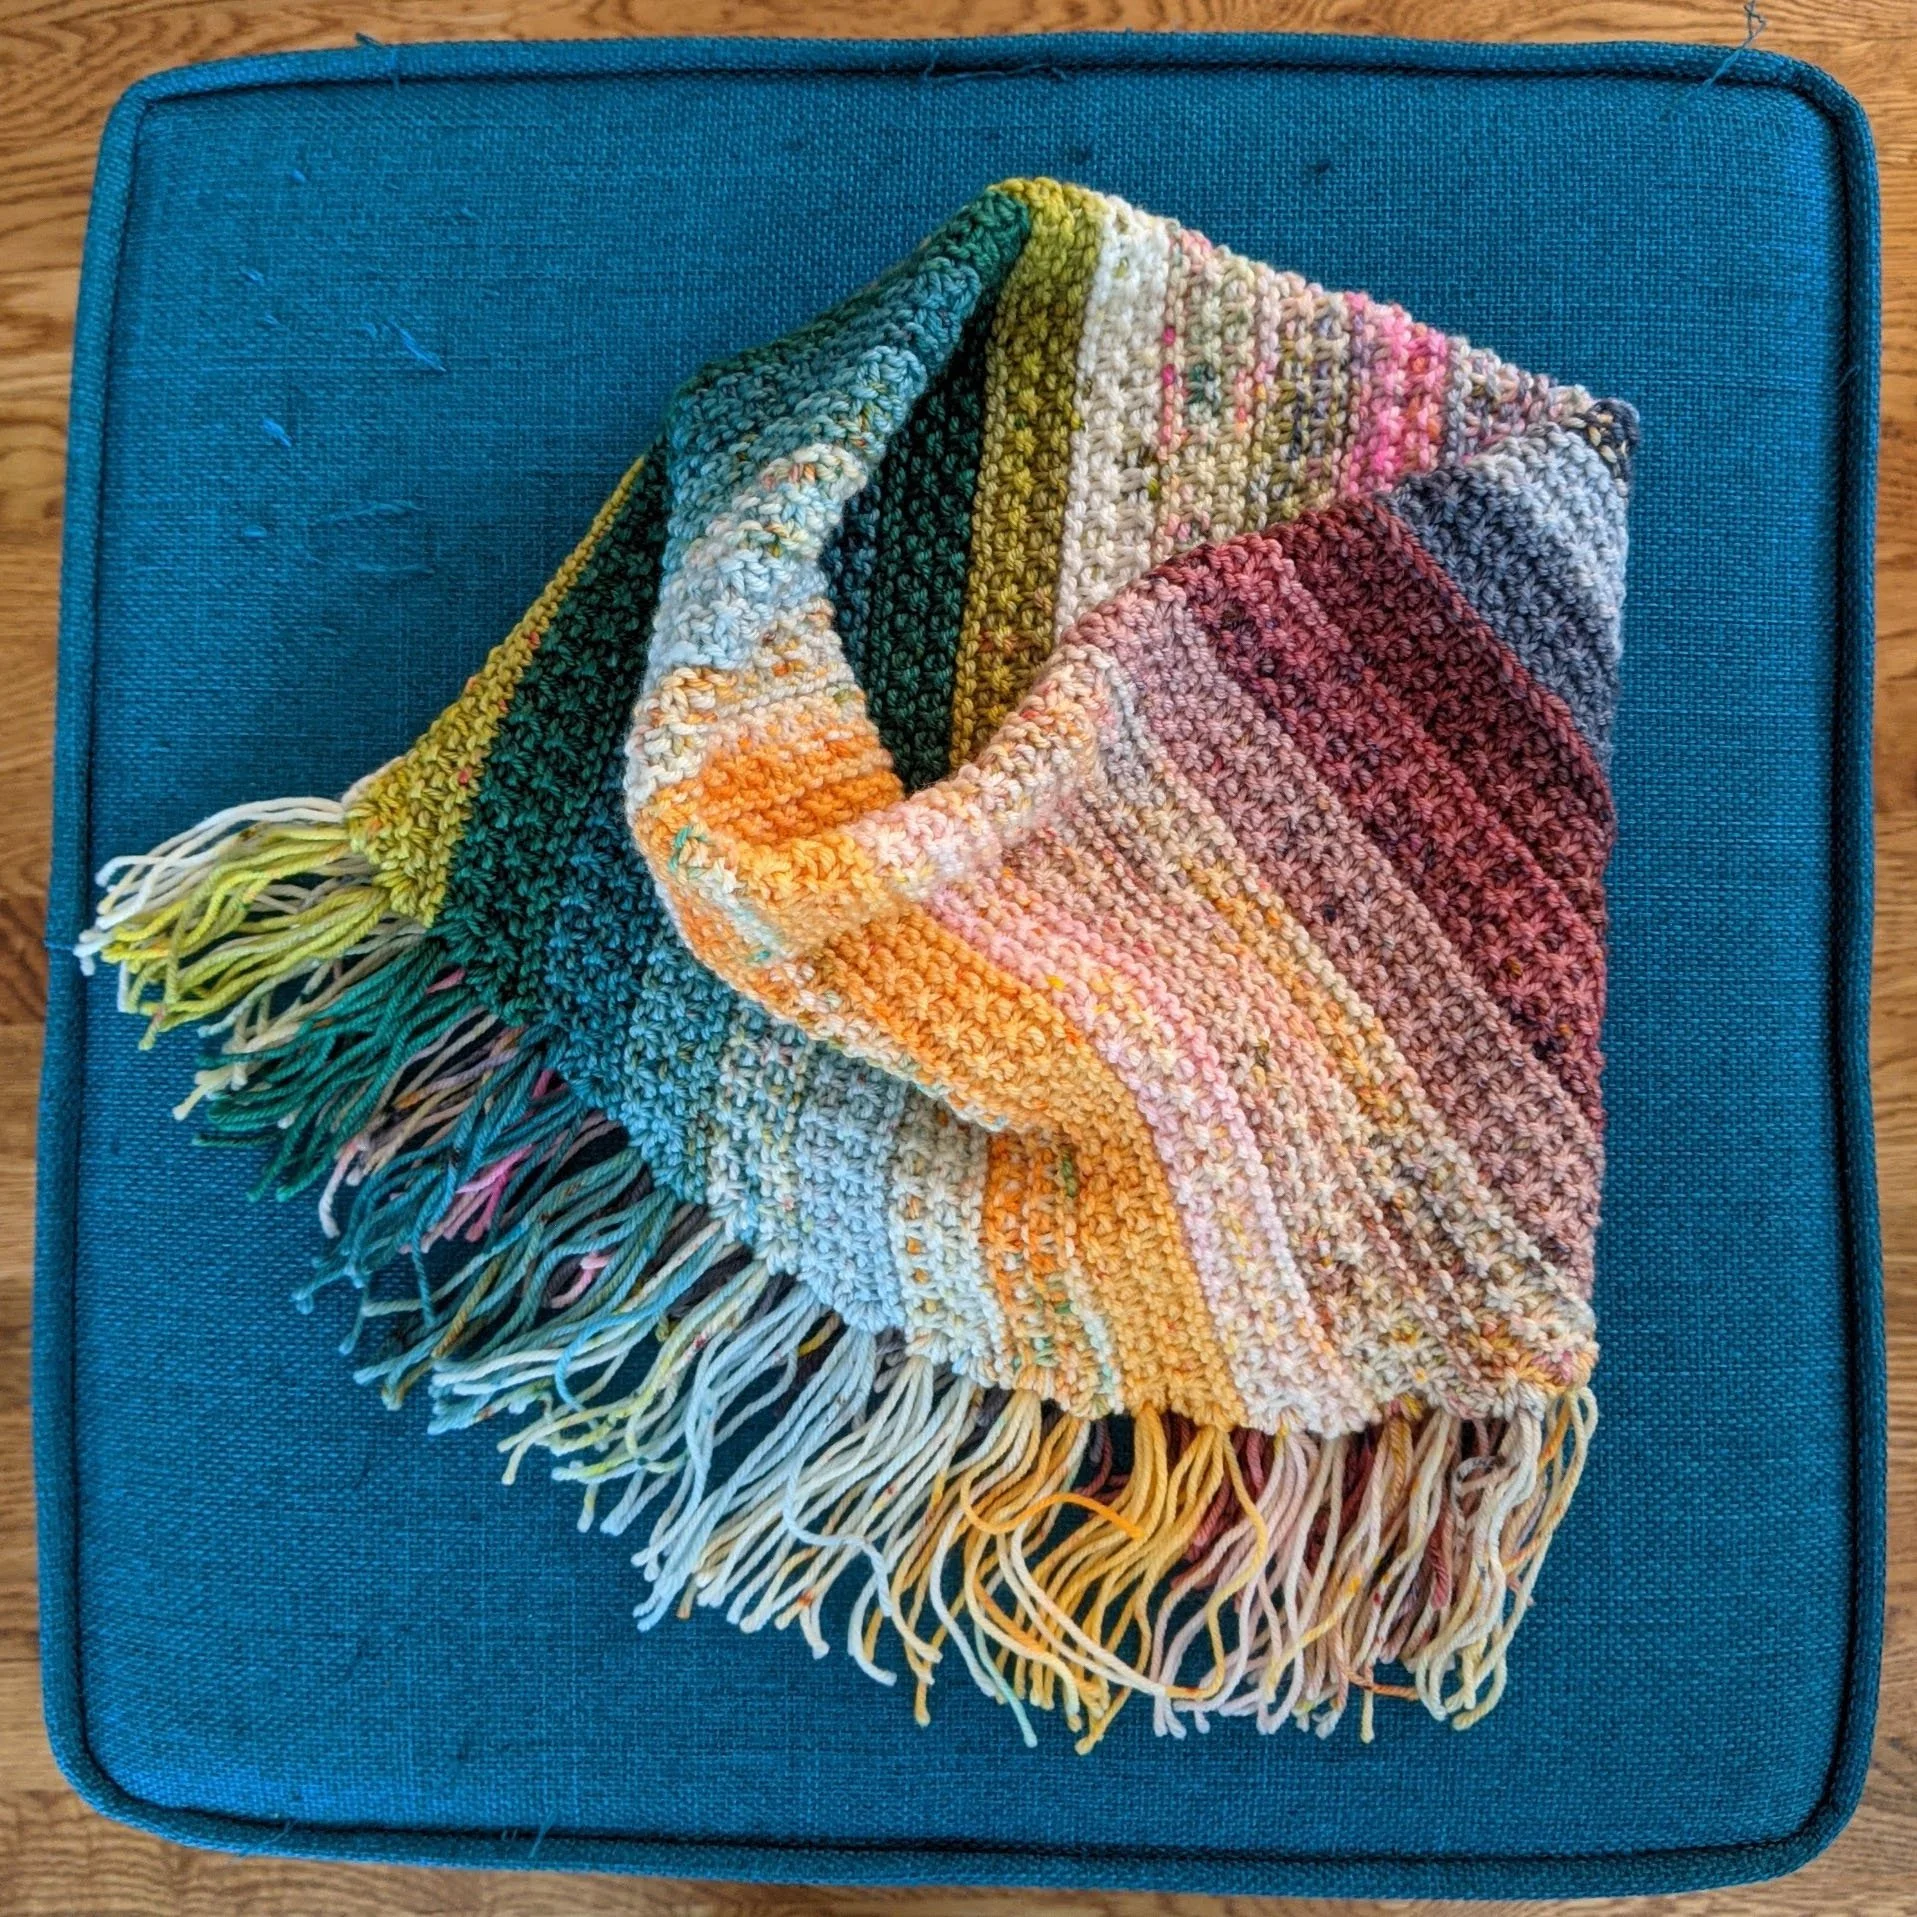
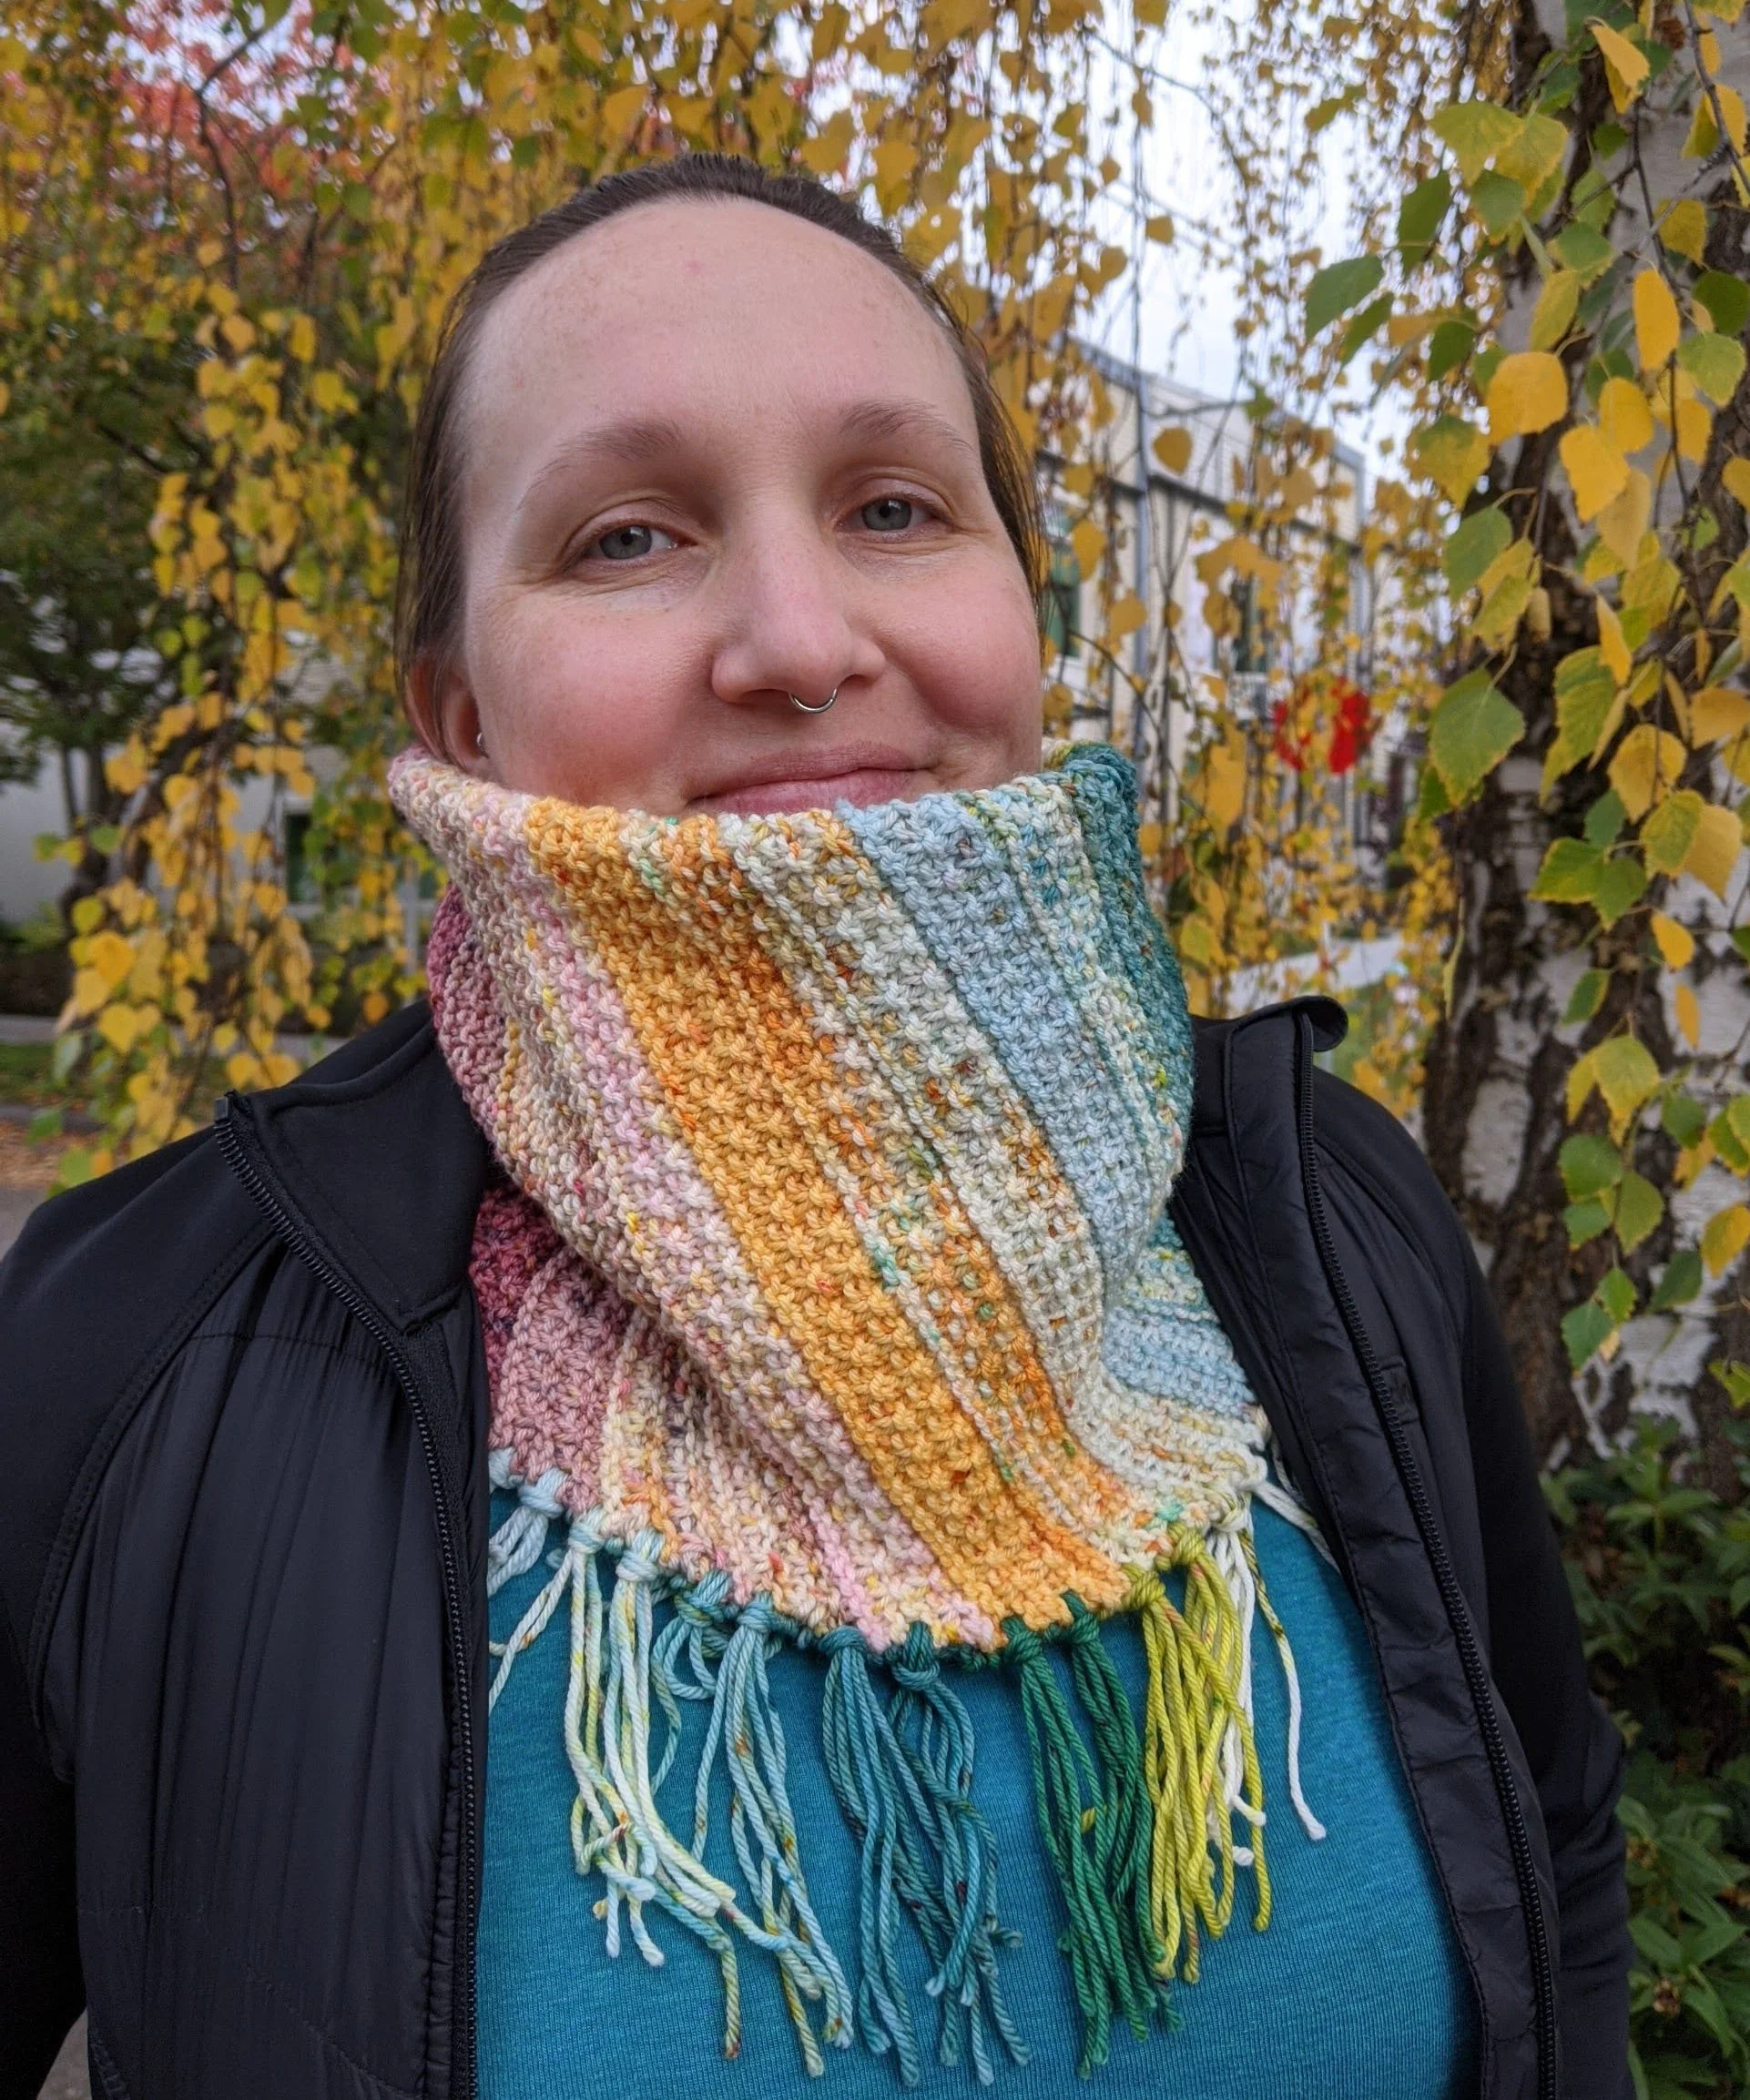
I friggin love how the cowl turned out. I also love the photos - thanks to my very patient partner! KnitCircus has bundles available on their site, and of course non-gradients will work just as well.

Flower Kerchief

A close-up of me wearing a green kerchief dotted with tiny pink flowers

A close-up of me wearing a green kerchief dotted with tiny pink flowers

Knit Picks has recently started doing Independent Designer Showcases, in which they gather up seasonal designs from independent designers and feature them during a certain time frame. I decided to submit a kerchief pattern to their spring-themed showcase, because I thought it would be more out of the ordinary than socks (which is what I originally wanted to submit…).

I’m pleased with what I came up with - a soft and practical kerchief that keeps hair out of your face and looks super cute! It’s also an extremely fast knit, which is good when the design involves things like straps, which are supremely boring to knit but required for the piece to wear properly.

Each color needs less than 50g of sport weight yarn - for the contrast color you seriously only need 5 yd/m, so you could easily pull from stash.

There are some fiddly bits, but I wouldn’t say this pattern is particularly difficult. There are some double increases/decreases (meaning you make 2 or decrease 2 when working an increase/decrease, rather than the usual 1), and the flowers are worked using stranded knitting. That said, the stranded knitting only occurs on right side rows, and said rows are not that long.

All in all, I think this pattern is pretty straightforward. It’s a little outside of my usual style, which was a fun challenge, but I think that’s also keeping me from being super passionate about it, as compared to a sock pattern. That’s okay, though - I still had fun designing it!

The same green kerchief laid out on a wood floor, with lime-green plants artfully arranged behind it

The same green kerchief laid out on a wood floor, with lime-green plants artfully arranged behind it

Double-up Hat and Cowl

A cowl knit on the bias in multi-colored, textured stripes. It's arranged so you can see that it's reversible (there is no wrong side). The bottom edge has fringe all around it.

The Double-up Cowl, arranged so you can see the right side on inside and out.

I had a gorgeous DK-weight advent set from Emma’s Yarn and really wanted to do something cozy and stripey with it! To showcase all of the colors, naturally I used my favorite pairing of provisional cast-on and 3-needle bind-off.

I wanted something extremely quick and satisfying to knit, but thought garter stitch might be a bit TOO boring. With slipped stitches in the mix, it was more engaging to work on. They of course look great on solid color yarns, but I also like seeing how variegated/speckled yarns change when you have these extra-long stitches.

I'm wearing a cowl in multi-colored, textured stripes. The fabric is stiff enough that the cowl stays up around my neck and chin.

Look how nicely the cowl stays up around my neck! Peak coziness.

Since the end goal was to fold the cowl in half and get a sturdy fabric, I made the fabric biased in the hopes that the shaping would help support the fabric. And it did! The biasing, when folded, creates a triangle which helps to keep the cowl propped up around your neck. My mom said it’s the first time she’s had a scarf or cowl that actually stayed up below her chin, which is what she wants to keep warm. (I’m sure the double-DK-weight didn’t hurt either)

Because I’m lazy and extra, I wanted to add fringe to the cowl but not have to seam it beforehand. Thus, I used the fringe to tack the two pieces of fabric together! Of course, it’s always an option to seam it and forgo fringe entirely or forgo seaming and add fringe! A could of my testers added fringe to one edge but left the other end loose so they can choose to fold or not.

A headband and hat laid out on the snow. Both have a multicolored, striped brim. The headband is finished with a round of crochet in green. The hat is finished with a brim in cream and yellow.

The Double-up Hat (and headband!) on the snow

With the headband and hat, I stuck to garter only. A big part of that is because I needed the extra stretch to accommodate multiple sizes, but also because I wanted to rush through the stripe knitting to get to the crown of the hat! The headband/hat brim is also worked on the bias, though, so I think the pieces maintain continuity. And you should be able to knit both from your 20g advent set - I made a cowl, a hat, a slightly larger headband, and I still have leftovers I think I’ll use for socks!

I admit that my original drive to create the headband was so I’d have something to keep my ears warm when I go to the gym on cold days and have my hair up, but after I made the hat…I fell in love with that version! I do still grab the headband when I’m heading out with my hair up, and it is delicious to not have my ponytail squashed or loosened by a hat.

Rogelio

Two feet modeling hand-knit socks in lavender yarn. A dainty lace motif repeats up the instep, and there’s a lacy ruffled cuff at the top.

Two feet modeling hand-knit socks in lavender yarn. A dainty lace motif repeats up the instep, and there’s a lacy ruffled cuff at the top.

Rogelio was one of the earliest Jane the Virgin-inspired socks that I had a clear concept of - given his flair for the dramatic, and the flowy shirts he wears as part of his role as Santos, it seemed only natural to give him something lacy and frilly to match his bold personality and over-the-top costumes!

For the lace pattern on the instep, I turned to my stitch dictionaries. I wanted something with a short-ish repeat, and the design I settled on is predictable enough that it’s not too hard to memorize either! The lace repeat itself is only 8 rounds, but it’s doubled by the addition of the lacy ribbing. The lacy ribbing is from one of the Japanese stitch dictionaries - I love it because it still functions like twisted rib, which is a lovely addition on its own, but adds a simple-yet-effective flair with the alternating lacy parts! During testing I realized the 16 round chart, complete with the ribbing columns for each sides, had been shrunk down a bit too much for some folks, so I added a page that just has that chart blown up as big as it will go. If you find yourself straining to see the instep chart, I hope that addition is useful to you!

The ruffle was the most challenging part for me, mostly because I’ve never knit one before! I’ll admit - my personal style is such that I just don’t wear ruffles. However, I feel like the concept really required it, so I learned a new skill! The ruffle design is an amalgamation of a few different ruffle designs I saw both on other socks and in stitch dictionaries, and is hopefully pretty straightforward to knit. That said - if you’re like me and don’t particularly want to knit a ruffle, the pattern tells you where to bind off after you’ve worked the ribbing.

Rogelio de la Vega saying “A hug from Rogelio is like a rabbit’s foot: lucky, rare, and soft to the touch.”

Rogelio de la Vega saying “A hug from Rogelio is like a rabbit’s foot: lucky, rare, and soft to the touch.”

For the color choice, though the rest of my JTV socks will be in either blue-teal-aqua or coral-pink-red to match the strong color themes of the show, for my man Rogelio I had to use lavender. After all, he doesn’t pop in peach!

Rogelio is available on all the platforms!

Payhip | Ravelry | Etsy | Lovecrafts

Counting the Days is here!

The last pattern in the Marking Time collection is here and ready for your advent kit scraps!

Weirdly, though my main goal for this project was to work well with advent kits, the yarn I used was a collection of 24 5g minis from Canon Hand Dyes. That at least gave the correct yardage limits as if I really were working with scraps, so it all worked out!

I’m wearing a cowl with stripes of garter and lace in different colors

Though my natural inclination with a simple daily knitting project is always garter stitch, I wanted a little bit of SOMETHING for visual and knitting interest. I found a simple lace pattern that has the added bonus of creating a slight chevron shape, and it worked perfectly! I couldn’t believe how much fun it was to knit the sample - that confirmed it as the perfect daily advent kit pattern. (Of course, it would be equally fun in a single color; that way you don’t have to pause in between each stripe!)

My favorite type of cowl is one where the different colors/patterns circle around your neck, rather than stack vertically, because the vertical type ones always end up hiding some of the design in the folds. This cowl is long enough to wrap twice (though I didn’t get any good photos of that since I later discovered a huge logo on my jacket was in every photo!)

The Wheel of the Year is here!

A circular shawl, made up of 8 sections in different variegated yarns, displayed on a log in the forest

In the last few years, Knitted Wit began to release seasonal holiday colors that line up with the solstices/equinoxes and the cross-quarter days that occur between them as part of their “Witch in a Box” line. For some reason, I decided to get these in DK weight instead of fingering, which is my go-to (as you might imagine from all the socks). Then, the 8 skeins marinated in my stash for many months while I noodled on how to best get them all into a single project. Originally I thought about doing some kind of mega-cardigan and striping the colors together, but ultimately I wanted each color to get to shine on its own.

Thus, the shlanket was born! I considered working it horizontally, but that would mean another provisional cast-on (which I LOVE and will never give up, but both of the other 2 designs in the Marking Time collection use it and I just wanted to take a break), and it would make stitch patterns tricky to fit into the short rows. Instead, I decided to work the sections of the shawl like pie slices, from the pointy end to the crust. Yum.

In order to get a good size shawl, I just kept knitting until I had about 30 inches of shawl - my initial attempt stopped at about 24 inches and just wasn’t a satisfying half-pi shawl size. But, working that much length meant I needed a lot of rows, and I get bored easily. Thus, each section in between the increase rows has a new stitch pattern to look forward to, just for interesting knitting!

Connecting each section isn’t as bad as you think - it’s a simple matter of picking up stitches along the edge of the previous section! The last section that joins to the very first one and creates the whole circular shawl is a bit fiddly in the first few rows, but it’s worth it if you want a big, snuggly blanket! Of course, if that’s not your deal you can always stop after 4 (or 5, or 6…)

Try it for yourself here:

Black Flame Candle is here!

Two hand-knit socks in orange and black stripes. Slipped stitches on the instep create a motif that looks like candle flames moving up the leg.

A bit late, but I couldn’t not talk about the creation of Black Flame Candle, my contribution to the 2020 Super Sock Scarefest knitalong (Ravelry link). The general theme of the Scarefest is that all sock patterns are inspired by scary movies. Of course, what constitutes a scary movie varies depending on who you ask! That’s why this year I went with our household favorite Hocus Pocus. I knew I wanted something that would hopefully be immediately recognizable to the film, but I couldn’t come up with anything for the human characters. The next most memorable element, for me (besides the cat), is the ~Black Flame Candle~ that sets the whole series of events in motion.

At first I tried to find a decent picture of the candle itself - it seems to have lots of writing on it, and I thought maybe I could design a colorwork pattern that resembled the candle itself. Unfortunately, the movie is old and there are few enough closeups of the candle that this proved impossible. There are some really enterprising individuals out there who have made their own versions, though, should you need to decorate a candle for your own home!

A grainy screen cap from Hocus Pocus showing the Black Flame Candle, ominously lit.

From there, I decided to focus on the flame itself. I started looking up stitch patterns that resemble flames (or leaves; frankly they often look interchangeable to me) and finally settled on the one I used in this pattern. In its original state, it was single color (and the written instructions had all the knits as “k” instead of “ktbl” even though based on the reference image, they were clearly “ktbl”!), so I spent a long time swatching with two colors to figure out if I could make it mosaic. I really wanted that bright outline so the flame would look like the one in the movie - dark in the center, with the white-hot outline to show you it was burning. As important as swatching is, I still don’t like doing it, so my swatch was only 20 stitches on each side and about 4 inches long since I worked the pattern a few different times.

After I had the flame motif worked out, I had to figure out how to make it work on the sock itself. Since it involves an “intro” and “outro” section where the stitch count is less than the main repeat of the pattern, I had to figure out how to handle the making the sock fit the same circumference of leg in those sections. Hopefully I hit on the right balance of increases and decreases - I didn’t get too many questions about it during the KAL so I think so?

The great thing about having this pattern be part of a KAL is there are so many projects to browse to see all the different color combo ideas folks had! If Ravelry is safe to use for you, I hope you’ll check out the different takes each knitter had.

You can get the pattern from any of the links below!

Star Chart is here!

I’m wearing the Star Chart cowl wrapped twice around my neck and holding up one of the wraps in front of my face to show off the marled garter and brioche triangles.

I’m happy to announce that my new infinity cowl, the first in a set of three patterns, is now available on all the usual places! The design and the name were inspired by a set of minis from Ritual Dyes - it came with 12 mini skeins inspired by each of the zodiac signs and I’ve been waiting for the perfect project to use them in since I got it.

Despite my love of socks, I decided to go with an infinity cowl for this design. I think I mostly wanted to be able to show off all of the colors at any given moment, depending on how I wrap the cowl. (With socks, there’s just no way to avoid having something hidden inside the shoe!) And, for whatever reason, I’ve been really feeling a need to marl all the things lately. Marling 2 fingering weight yarns means DK-worsted weight, which is convenient both for strain on my hands and speed of knitting up, but I wanted a little SOMETHING fun to look forward to with each color (besides getting to knit with it, of course). And marling can sometimes obscure the color (on account of the marling). Thus…I settled for 2 color brioche!

Two version of the cowl (one with a cream background color and minis in rainbow order, the other with an almost-black green background color and minis in zodiac order) are hanging from a tree branch.

I didn’t want to do a whole increase/decrease round thing, and since I already had the 2 colors ready to go, I figured, why not split them up for the brioche sections? The gauge is pretty similar after all. And because I can’t leave well enough alone, I wanted to use short rows to make triangular wedges of brioche rather than rectangles. Also, the original design I was toying with was focused on alternating triangles that I just couldn’t make work as intended, so this KIND of achieved that, though in a totally different way. Small victories!

On account of the brioche and the short rows, this pattern is on the intermediate-advanced end of the scale. However, don’t let that discourage you! If you’re new to brioche, it’s just a technique you haven’t learned yet. And I’ve included tutorials in the pattern made by brioche-queen Sosu (Susanne Sommer), so you’re in excellent hands for picking up this new skill.

I’d love to see this design in a variety of color choices - obviously it’s ideal for that endless and beautiful collection of fingering weight scraps and partial skeins I assume everyone else also has, but it’s great for half-vent sets (or those new-fangled Halloween advents, which are also ingenious and perfect!), or even two full skeins! The right side will showcase all your myriad scraps, but it’s reversible thanks to both garter and brioche, so you can always pick which side to show off.

You can get the pattern below, or scroll farther for links to the entire collection!

Links to the collection:

Chocobo Racer is here!

After much teasing regarding the colorway and inspiration for this pattern, the day has finally come!

Two feet wearing handknit socks in warm yellow yarn with brown and orange speckles. A lace pattern that looks like feathers rings the cuff, and a different lace pattern wanders down the outside instep of each foot.

Chocobo Racer, inspired by chocobos from Final Fantasy and shown in the lovely color “Golden Chocobo” from Shipyarn, is now available on Ravelry and Payhip. I’ve also created a Low Vision Attribute version based on the guidelines from the Accessible Patterns group on Ravelry. That version has 24 point black sans-serif font (Arial), 1” margins, and only the written instructions for the charts.

You can also get one of a limited number of kits, which include a skein of yarn in the Golden Chocobo colorway and a copy of the pattern, from Shipyarn’s shop.

This pattern was a collaboration project with V, the mastermind behind the fandom-inspired colorways at Shipyarn. She wanted to expand her yarn base selection to include a fingering weight yarn, and I not-so-subtly insisted that it should be appropriate for socks. Because socks.

The same lacy socks on blue sock blockers, displayed on a wood floor, with a skein of the yellow yarn in a swirl next to them.

We tested a few different options, and ultimately she went with a 100% polwarth base. I feel like I only recently heard about/came into contact with polwarth, so if you’re also new to it then you should know that it’s actually a variation from merino, and was developed to be hardier while still maintaining softness. Shipyarn’s polwarth base isn’t as soft as a merino/nylon blend at first blush, but it softens with wear and washing AND has great stitch definition and sturdiness. 5/5 would recommend!

Since the inspiration was the majestic chocobo, I felt the pattern needed some kind of avian flair. The lace on the cuff looks like a ring of feathers, which is delightful, but my absolute favorite part of the design is the lace panel that traipses down the leg. The intermittent and constantly-moving clusters of yarnovers make me think of footprints (or bird tracks) in sand, as if a very indecisive bird scuttled this way and that, trying to figure out which way to go. With that mental image, I knit the sample very quickly!

Get this pattern from Ravelry or Payhip with the buttons below. As with all my patterns, it will be offered at 15% off for 1 week after release.

Little Bits Beanie is here!

LBB 9.jpg

I’m happy to announce my first hat pattern is now available on Ravelry! The Little Bits Beanie was designed at the request of my partner, who needed a new hat to replace his well-worn and very hogged-out commercial knit hat. He wanted something neutral, but was open to some color, which turned out great because I have a LOT of fingering-weight scraps.

I picked Knit Pick’s Hawthorne partially because it feels less “warm” to the touch than something softer like a merino blend and partially because I have a fair amount of it in gray. The gauge is pretty loose, because Hawthorne is already an exceptionally dense yarn (100g = 400 yd / 366 m), and because he didn’t want a warm hat so much as a fashion hat. The scraps I picked were mostly of the lighter fingering weight variety, but the stripes are short enough that it’s not noticeable.

The original sample was knit with a nice long ribbing, but when I had him try it on he said he wanted a snugger brim, so I dropped another needle size and opted for a folded brim, which creates even more negative ease on account of being double-thick fabric. As much as I hate the joining round on a folded brim because it’s so fiddly, I loooove how they look! Plus, it’s so decadent to have the nice and smooth knit side against your forehead. Having tried both types of brims, I figured both could stay in the final pattern.

LBB 2 resize.jpg

For the stitch pattern on the hat itself, I spent many weeks waffling about it. I was originally trying to find something with slipped stitches, possibly slipping stitches with yarn in front to really enjoy the different CCs throughout the hat, but I eventually gave up on that idea because the slipped stitches might cause the stripes to pull or pucker differently than the rest of the hat. The pattern I eventually settled on was simple, but depending on whether you use the MC or the CC to make the purl stitches, it looks pretty different! Thus, another choose-your-own-adventure element was added. I’d love to try this same stitch pattern, but all over the hat rather than in stripes, just because the more repeats you do, the more it starts to look like a lattice (to me anyway).

The crown shaping incorporates another of my favorite techniques - the CDD. Not only do I like the look, but I like the efficiency of taking care of 2 decreases with one stitch! Working CDDs with stitch markers all mixed up in the stitches is a pain in the butt, so if you’re interested in trying it without stitch markers, I wrote a tutorial that will hopefully help!