
I love knitting lace shawls that creates a biased fabric and always wondered how the lace patterns were made.
After a lot of googling, hoping there was some kind of easy trick, I have come to the conclusion that the easy trick is…just messing around with the pattern until you add enough increases/decreases to either end that you’re ready to work a new repeat when it’s time to do so.
I won’t pretend to be an expert on this, so I don’t have any super quick tips. What I will do is describe the process I used, in case that helps you apply the same process to other lace motifs.
I’m working with a 7-stitch repeat, which I arbitrarily am adding 4 edge stitches to (2 before, 2 after). The repeat is only 4 rows long, so I’m going to work it twice, giving me 8 rows in which to add 7 stitches on the front end (adding 1 repeat), and remove 7 stitches from the back end (removing 1 repeat).
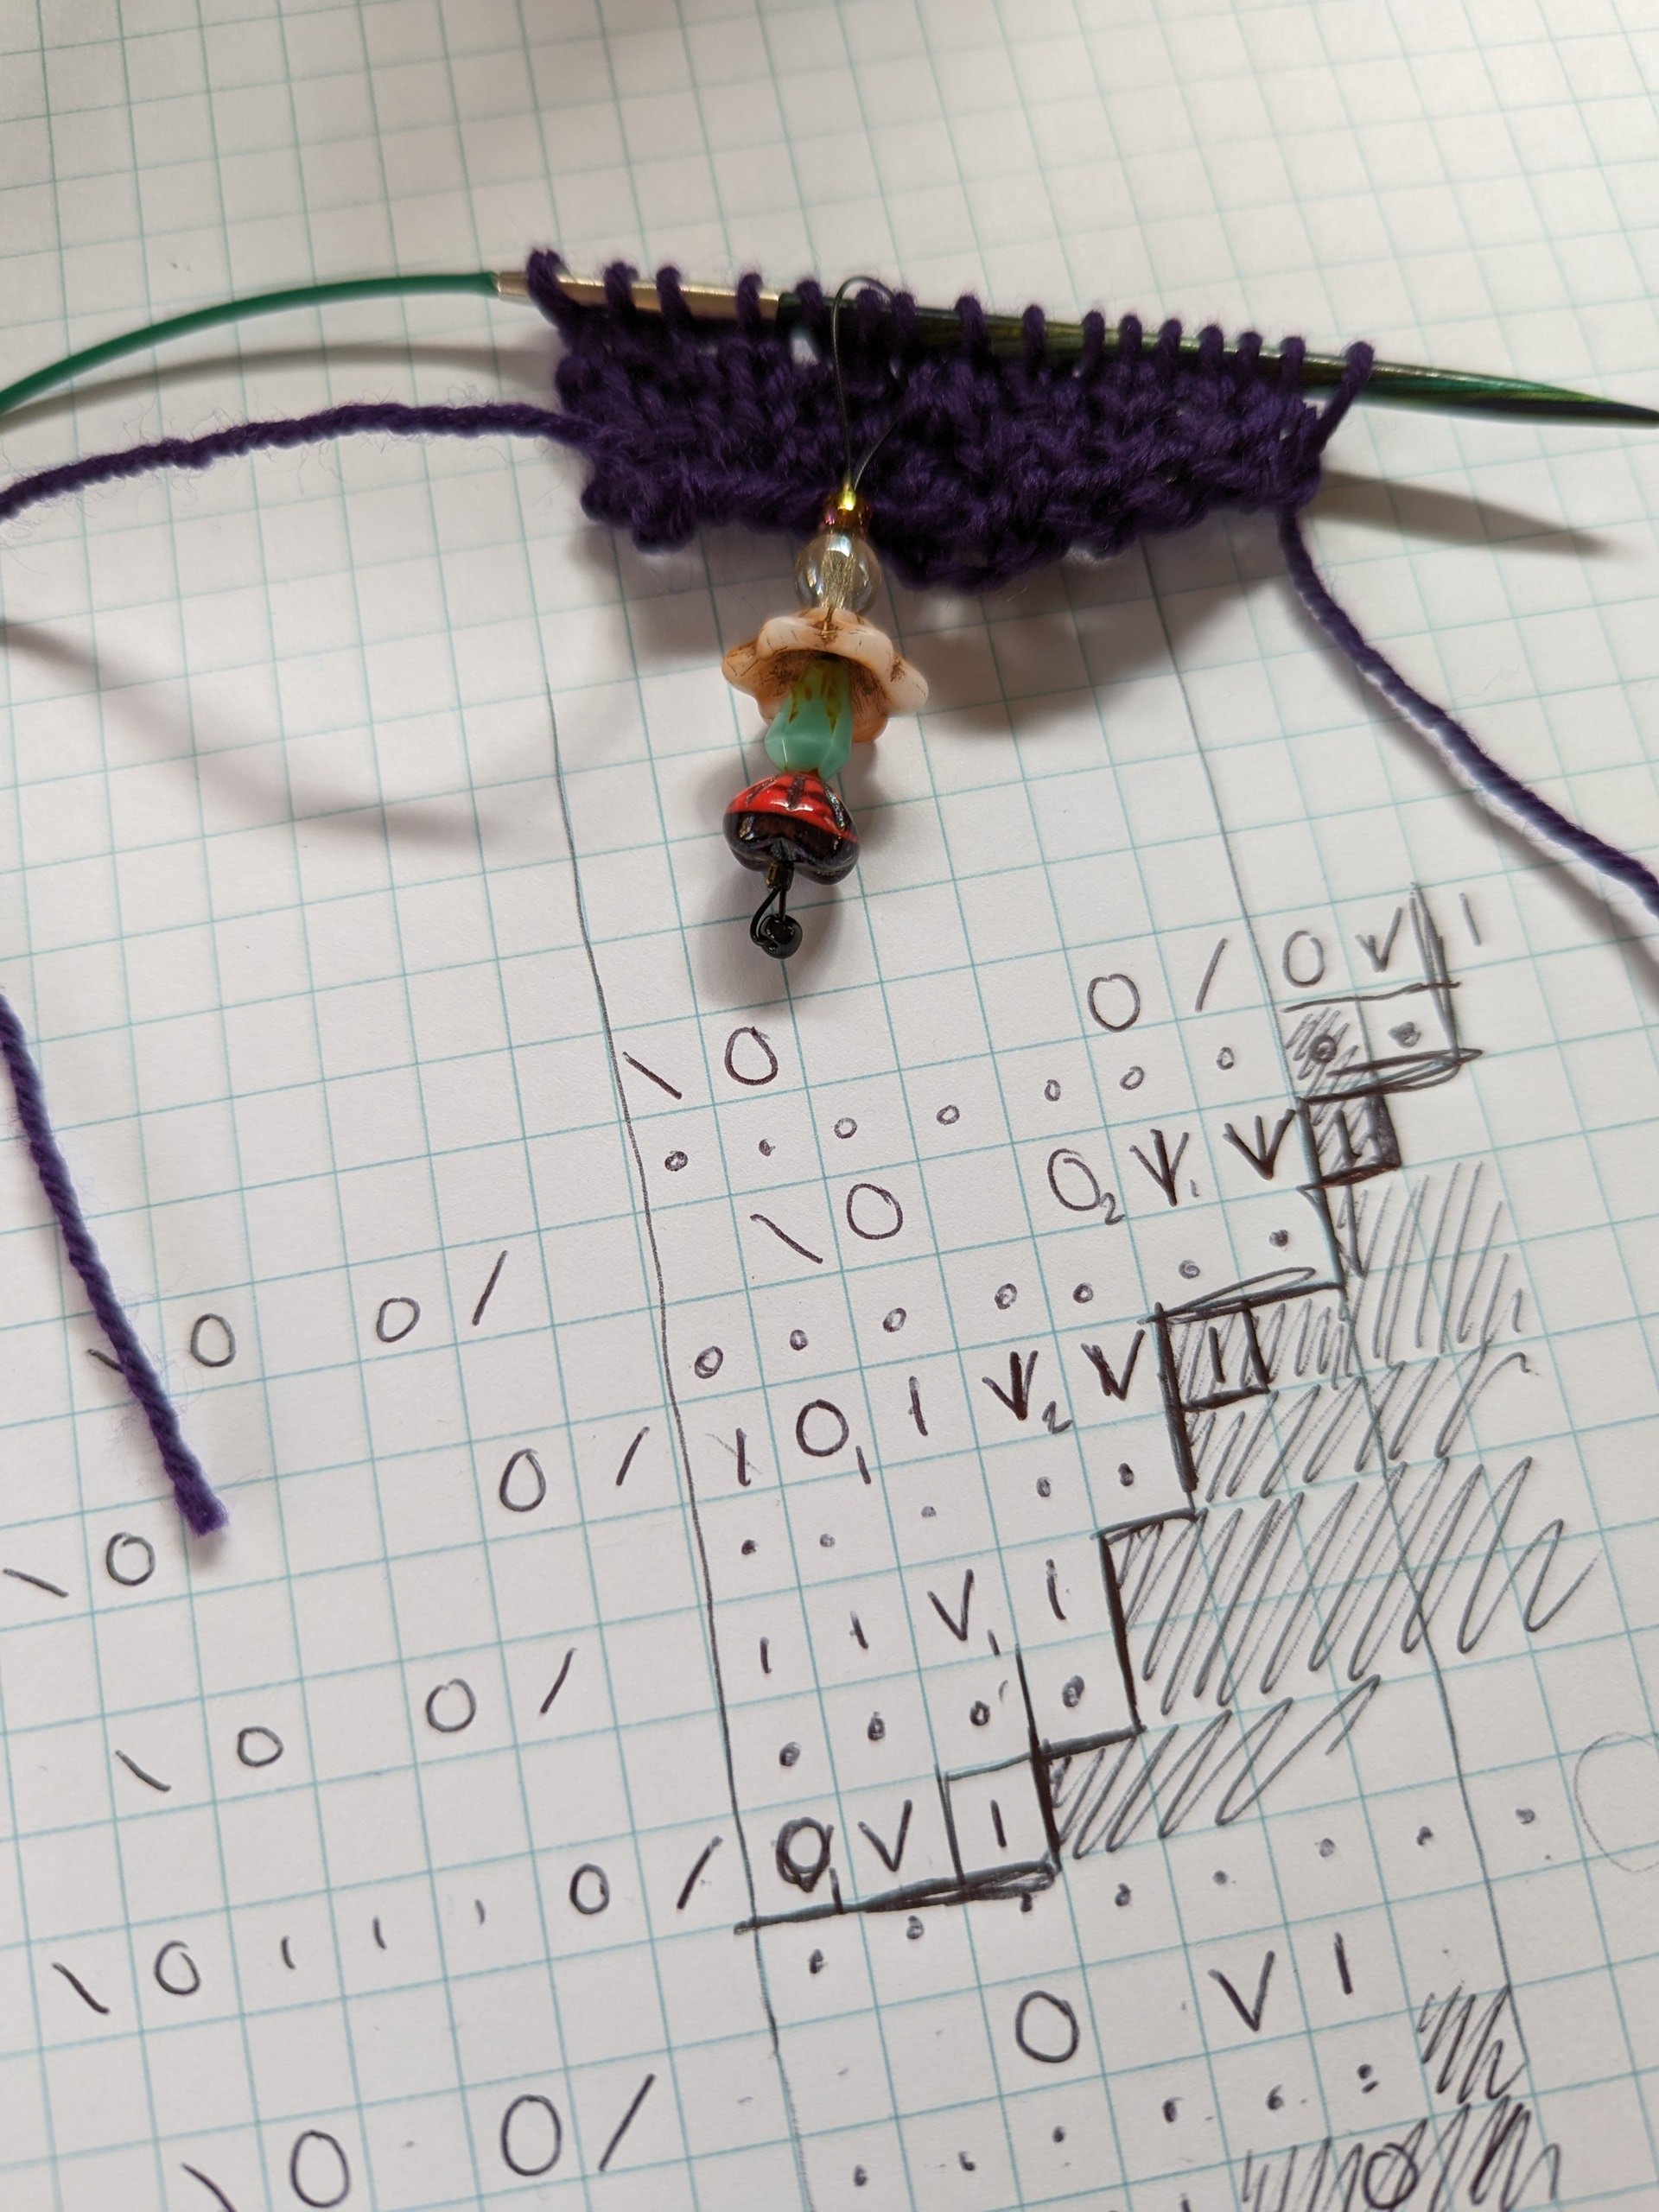
Special knitting graph paper exists, but any will do for this task since we don’t need to have accurate stitch dimensions. I’ve got most of a pad that I think I’ve had since…high school maybe??
I start with the front end first - maintaining the exact same stitch count over the repeat isn’t a huge deal so long as I start and end with the same count, so I’m not worrying out making the increases/decreases match exactly and leaving the back end for later.
Write out the base repeat a few times and decide how many repeats/rows you’ll need to add another repeat. To check my math I’m including purl rows.
In this case, I’m using 8 rows, so 3 RS rows will need to have 2 stitches added, with the 4th adding 1. When possible, I want to start working elements of the repeat into the new stitches, so the increasing section is less obvious. In other words, I don’t want the new section to be pure stockinette until it’s ready to accommodate a full repeat. (This is just personal preference!) Plus, you can use the yarnovers from the lace as increases.
As you can see from the many marks, a lot of this was trial and error. I wrote out several iterations before trying a swatch and made further corrections once I was able to see where stitches were lining up in relation to the increases.
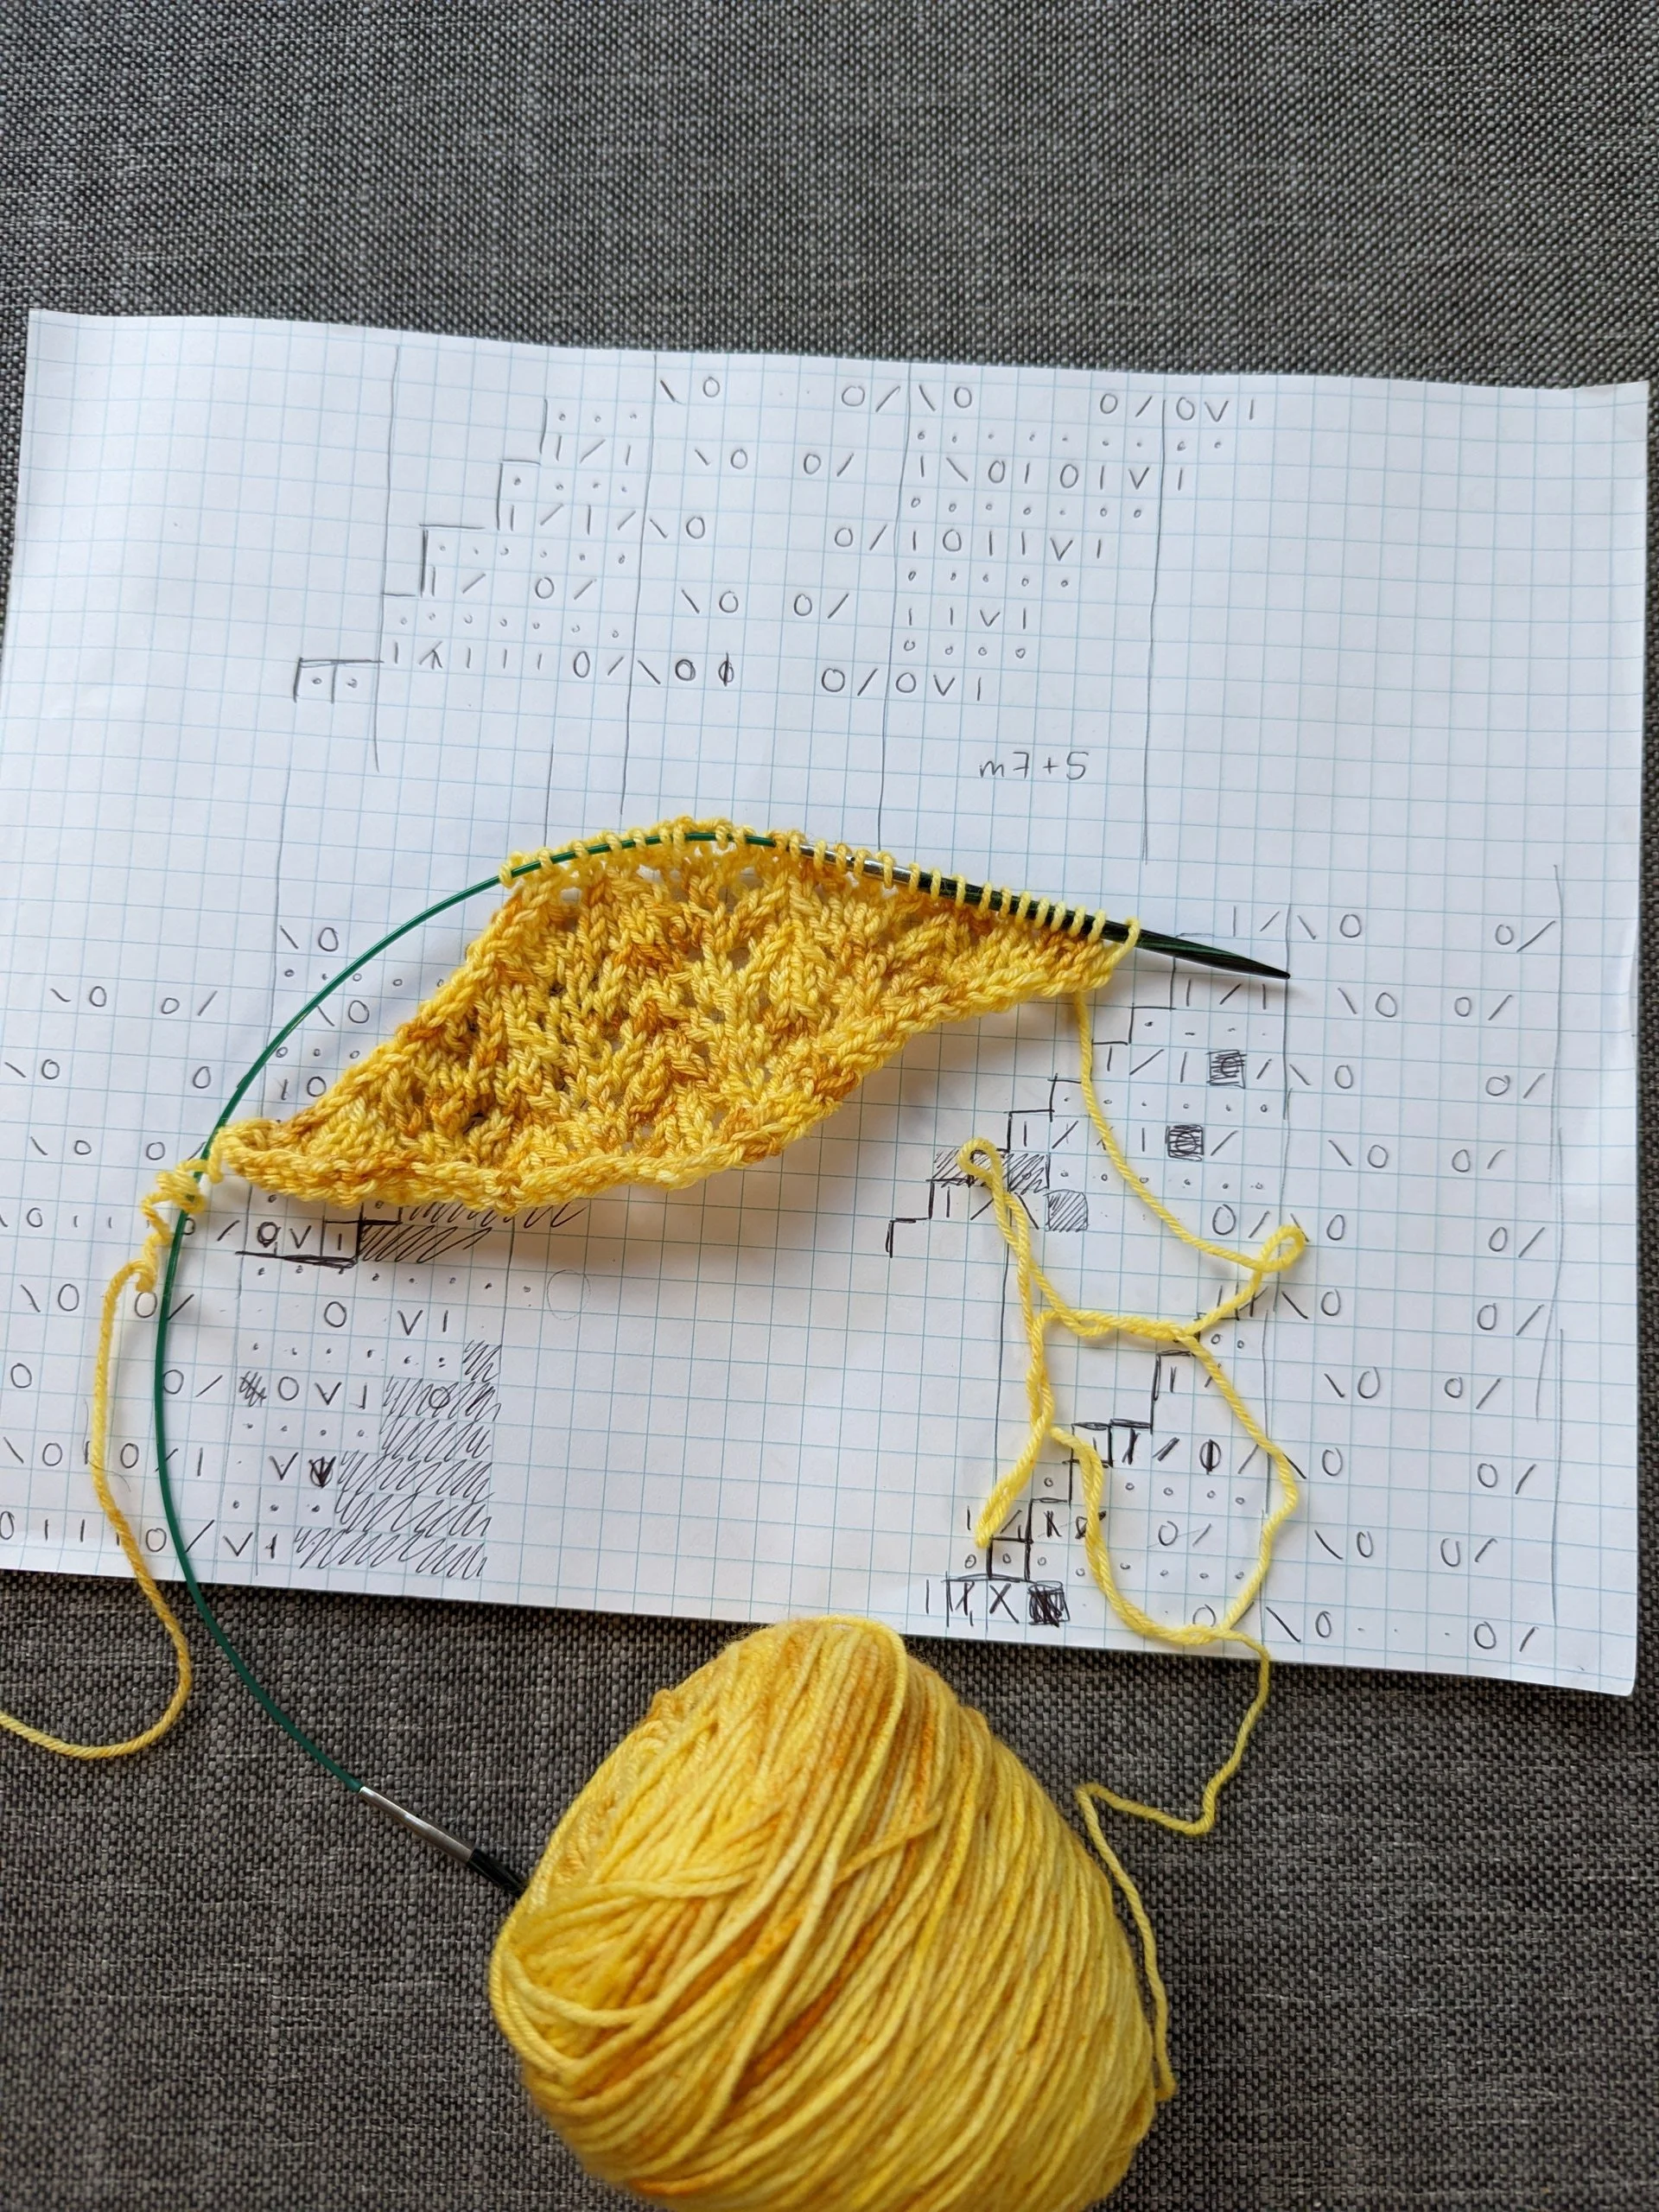
Then, it was time to do the back end. Same deal as before, except this time starting with two full repeats + edge stitches, and gradually removing stitches from the last repeat. From this, I learned I would need to have 3 edge stitches at the end to accommodate decreases. Then, after I had a decent setup for the decreases and had tested it out on my swatch, I realized I had the same problem as before - not enough yarnovers on the decreasing side! So I reworked it yet another time, this time adding in more of the original lace elements and moving decreases as needed.
I’m happy with the results, although knitting the swatch was crucial to double-checking my assumption about stitch counts and placement. Maybe a lace genius would have been able to accurately guess these without swatching, but unfortunately I’m just not at that level! The good news is regular old elbow grease did the trick, and now I feel way more confident in trying this in future patterns!

