design talk

Untangling lace on the bias

I love knitting lace shawls that creates a biased fabric and always wondered how the lace patterns were made.

After a lot of googling, hoping there was some kind of easy trick, I have come to the conclusion that the easy trick is…just messing around with the pattern until you add enough increases/decreases to either end that you’re ready to work a new repeat when it’s time to do so.

I won’t pretend to be an expert on this, so I don’t have any super quick tips. What I will do is describe the process I used, in case that helps you apply the same process to other lace motifs.

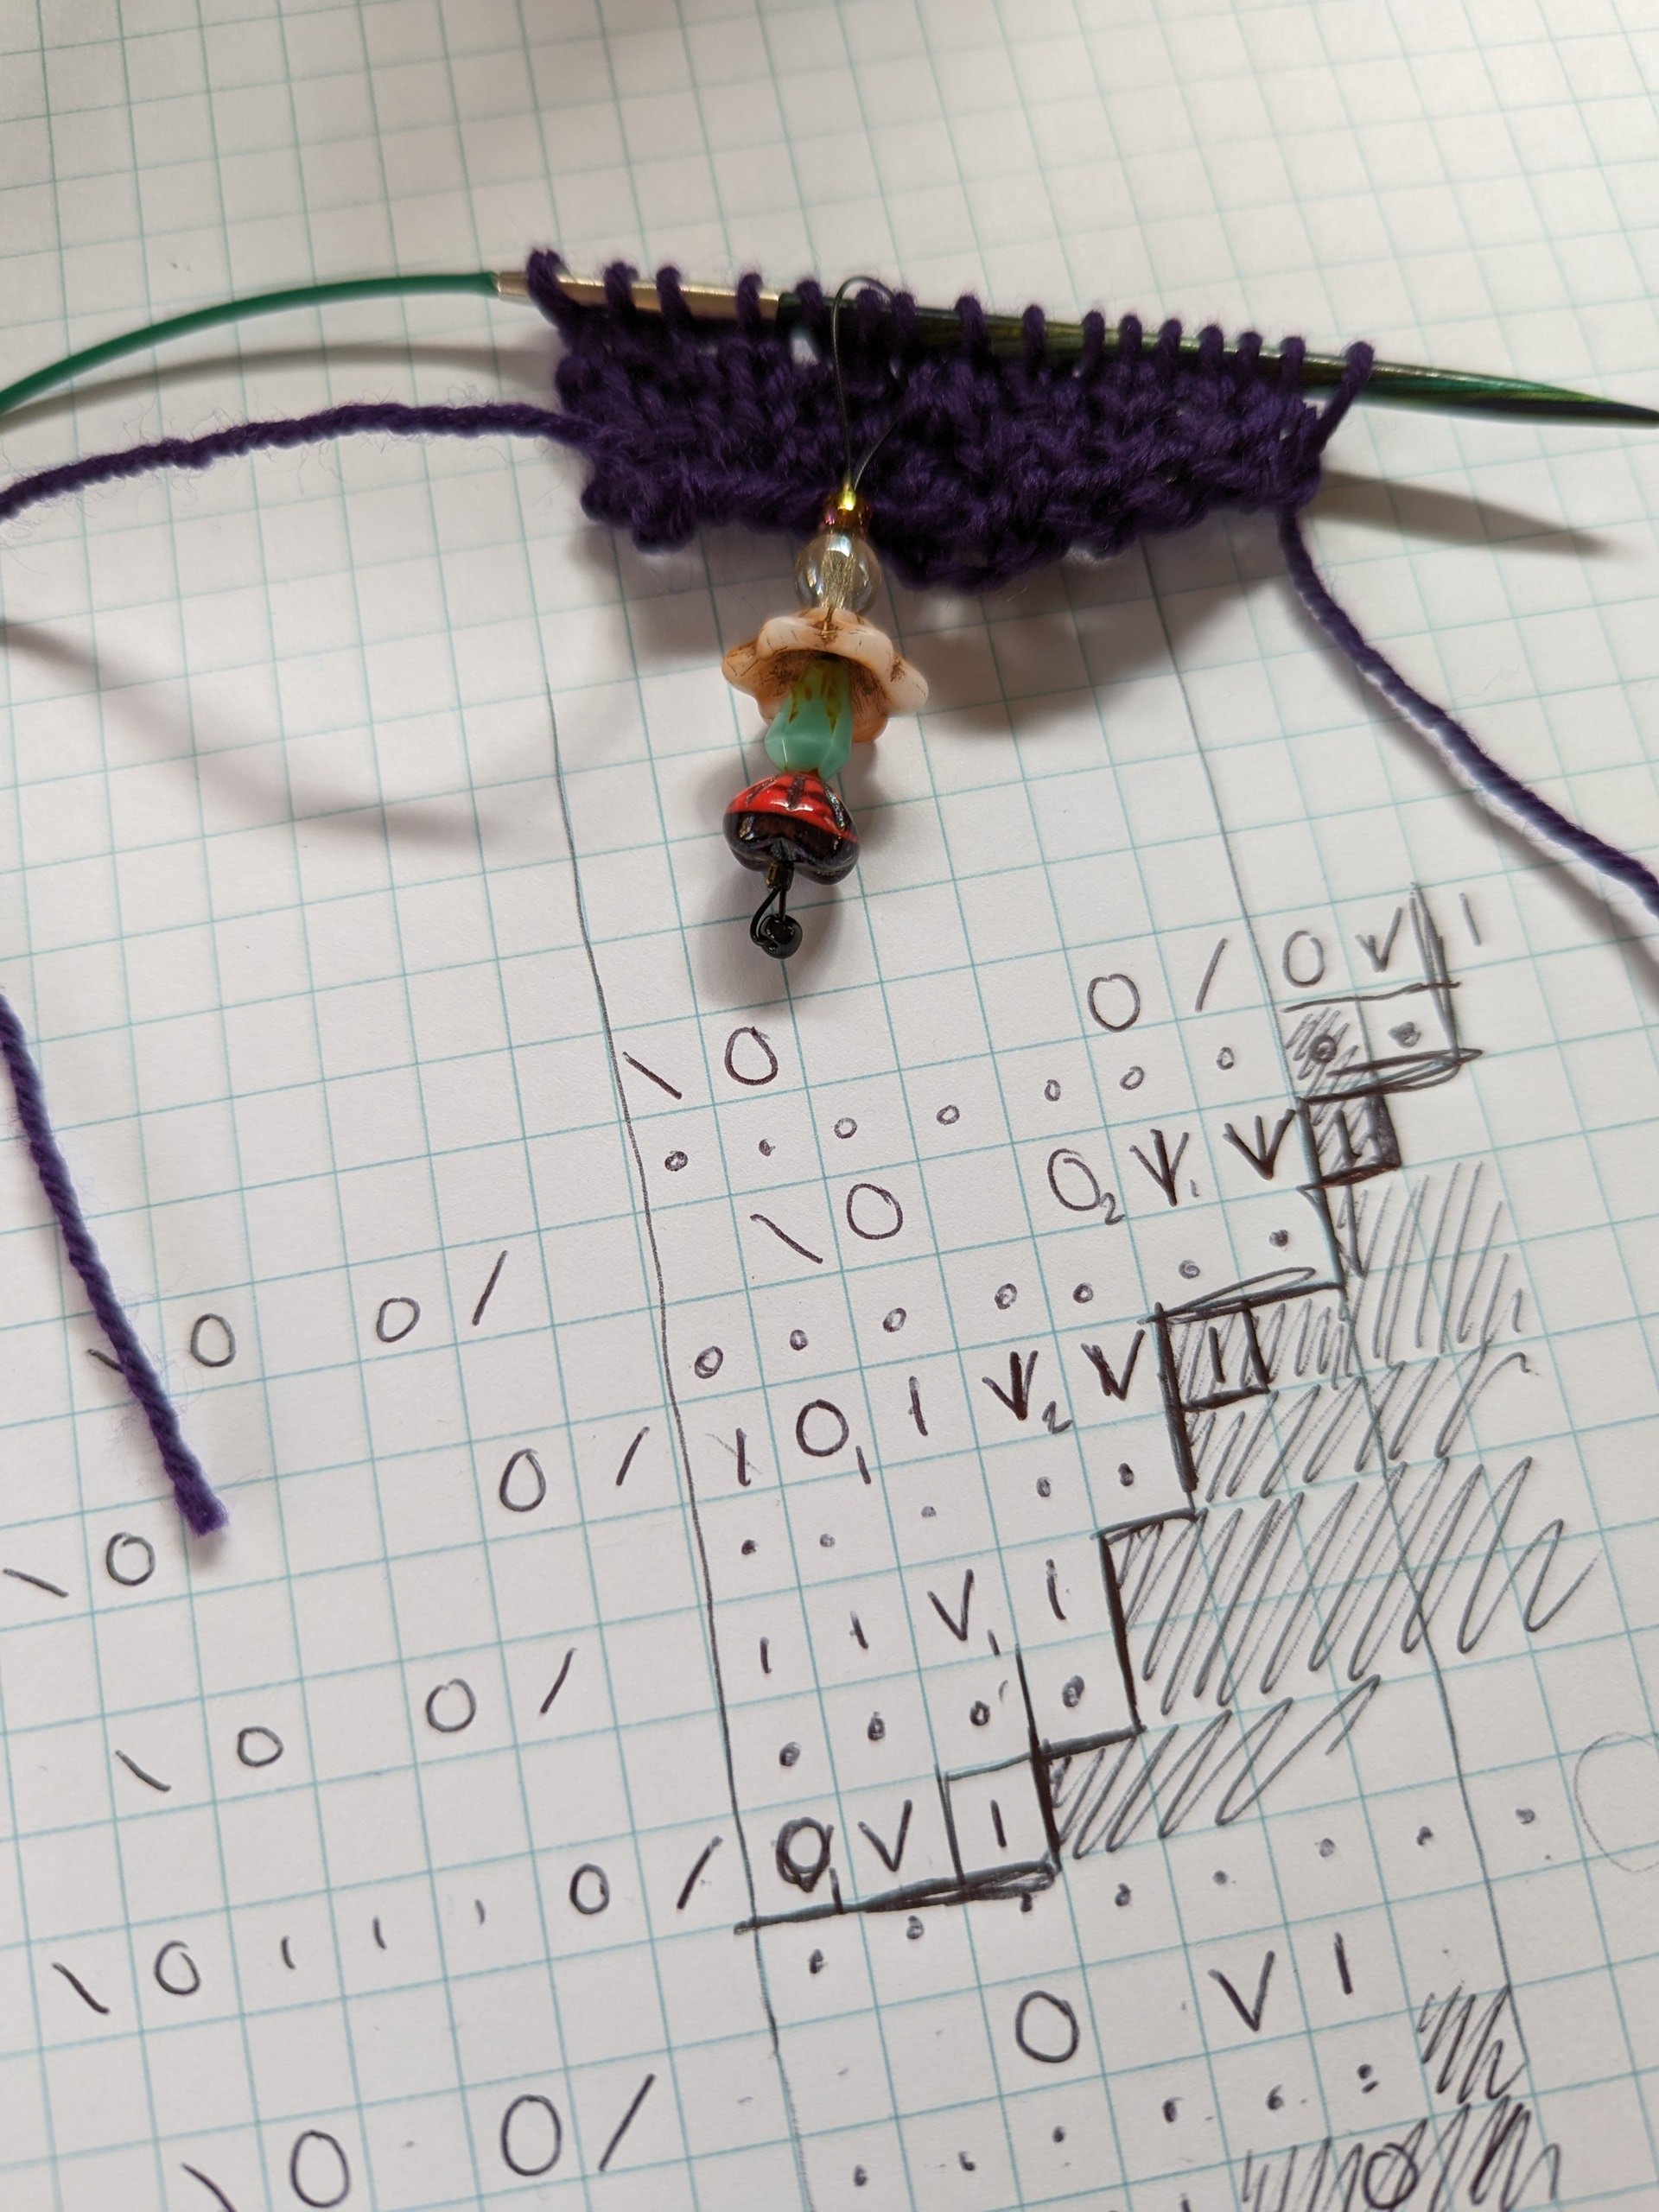
I’m working with a 7-stitch repeat, which I arbitrarily am adding 4 edge stitches to (2 before, 2 after). The repeat is only 4 rows long, so I’m going to work it twice, giving me 8 rows in which to add 7 stitches on the front end (adding 1 repeat), and remove 7 stitches from the back end (removing 1 repeat).

Special knitting graph paper exists, but any will do for this task since we don’t need to have accurate stitch dimensions. I’ve got most of a pad that I think I’ve had since…high school maybe??

I start with the front end first - maintaining the exact same stitch count over the repeat isn’t a huge deal so long as I start and end with the same count, so I’m not worrying out making the increases/decreases match exactly and leaving the back end for later.

Write out the base repeat a few times and decide how many repeats/rows you’ll need to add another repeat. To check my math I’m including purl rows.

In this case, I’m using 8 rows, so 3 RS rows will need to have 2 stitches added, with the 4th adding 1. When possible, I want to start working elements of the repeat into the new stitches, so the increasing section is less obvious. In other words, I don’t want the new section to be pure stockinette until it’s ready to accommodate a full repeat. (This is just personal preference!) Plus, you can use the yarnovers from the lace as increases.

As you can see from the many marks, a lot of this was trial and error. I wrote out several iterations before trying a swatch and made further corrections once I was able to see where stitches were lining up in relation to the increases.

Then, it was time to do the back end. Same deal as before, except this time starting with two full repeats + edge stitches, and gradually removing stitches from the last repeat. From this, I learned I would need to have 3 edge stitches at the end to accommodate decreases. Then, after I had a decent setup for the decreases and had tested it out on my swatch, I realized I had the same problem as before - not enough yarnovers on the decreasing side! So I reworked it yet another time, this time adding in more of the original lace elements and moving decreases as needed.

I’m happy with the results, although knitting the swatch was crucial to double-checking my assumption about stitch counts and placement. Maybe a lace genius would have been able to accurately guess these without swatching, but unfortunately I’m just not at that level! The good news is regular old elbow grease did the trick, and now I feel way more confident in trying this in future patterns!

How I knit my toes on toe-up socks

I’ve been working on a bunch of toe-up sock designs lately and since I often get questions about the placement of the increases, I figured I should create a comprehensive answer I can share.

The toe begins with either Judy’s Magic Cast-on or the Turkish Cast-on - something to get an even number of stitches across 2 needles. You could go right into increases here, but I usually knit one round just to establish a base round.

Then, I increase 4 stitches every round (2 on the instep, 2 on the sole) until about 1/3 of the total stitch count is reached. After that, it switches to 4 stitches every other round until the total stitch count is reached.

The placement of the increases is what catches people’s eye. I like to do:

K1, KFB, K to last 3 sts, KFB, K2.

The placement of the KFB isn’t symmetrical, but that is intentional. I want the “purl-bump” second stitch created by the KFB to be symmetrical across the stitches. By placing the KFBs as above, it looks like there are 2 sts on either side of the purl-bump.

Is this a huge deal? Absolutely not. It literally only stands out to me while knitting the sock - once it’s done you can barely tell. But - since I spend so much of the time knitting my projects in addition to wearing them, I do this to make the knitting part feel as satisfying as the wearing part. If you’d rather the KFB itself be symmetrical, moving it over one stitch will not affect your finished sock AT ALL so please feel free to do so!

This stupid sweater!!

For two years now I have told myself I will publish my first sweater pattern, and it will be a Sizing With Spreadsheets pattern.

Three striped sweaters in varying colors

Since then…I have knit not one, not two, but THREE samples. All of them have made improvements upon the previous versions, but the design isn’t yet where I want it to be, especially if I intend to have test knitters try it out! It’s annoying enough that I will have to eventually bite the bullet and frog these sweaters if I want to reclaim the yarn; I would never do that to testers.

Despite the many frustrations, I still love the concept for this design and think I can make it work. The issues are twofold - first, raglans can be tricky to fit in general. Second, the stripe sequence makes neck shaping impossible, so I’ve deepened the neck to the point where I can’t just use average raglan lengths, I need the raglan length - X.

After 3 attempts, I have yet another calculation to try, if I can get over my apprehension about knitting another dud. I’ve already promised myself that this time I will STOP at the end of the raglan and try it on a bunch before even THINKING about splitting the sleeves. Now that I’m thinking about it, it would probably be good to block it on the needles, especially since the yarn I’m using (Felici) drapes nicely after blocking when knit at this gauge.

A less crucial issue, but still one I’ve been noodling on, is the number of yarns I should use for the helical stripes. The prototype of this sweater used 4, and the self-striping was broken up enough that the sleeves don’t look like big stripes of colors.

The first sample of my design was done with 6 yarns, which is technically possible but not really advisable. I feel faint when I consider frogging it, and I know at some point a knitter will need to frog to switch yarn or needles or fix an error. If I don’t want to deal with it myself, I can’t expect someone else to.

The second and third samples use only 3 colors, but unfortunately the stripes group up very obviously on the sleeves (which is why I used 2 solids in the worsted weight sample).

But! I had a shower thought the other day about how I can make 4 colors work while still getting the visual result I want with the yarn changes. I shall be incorporating it into my next…fourth sample.

Please send fortitude, as at some point I will need to frog the previous versions…!