
Those of you who’ve seen even a little bit of my knitted FOs know that I’m a complete sucker for rainbows!!! And I’m currently undertaking that ubiquitous step on my knitting journey of...knitting the Hue Shift Afghan.
This pattern is written by and published by Knit Picks. They have some pre-made kits for sale, but you can also swap colors in and out to create your own color palette. (This isn’t a sponsored post or anything, I just think that’s cool!)
One of the most common modifications I see for this pattern is working only the center spine CDD stitch as always-stockinette (so, purling it on the WS), rather than garter stitch. This creates a really clean diagonal line across each square, and, for me anyway, makes it easy to know when you’ve hit the center stitch and need to work the CDD.
When adding a new square to the blanket, it’s possible to pick this CDD stitch up in such a way that the line of stockinette center stitches continues across all of the squares! It only took me, oh, 30 squares or so to get it right, so I want to share it here for posterity.
I work the center stitch as a CDD on the right side and a purl on the wrong side, which means the center spine is comprised of two stitches in each color for the striped squares. I think the striped squares make what I’m describing easier to see, so I’ll use those as my example.
You’ll either be casting on or picking up stitches on the way to this CDD stitch, so do those as you will. I personally slip the stitches at the end of each row with yarn in front, then work them at the beginning of the subsequent row, so there’s an easy-to-see-spot to pick up from.

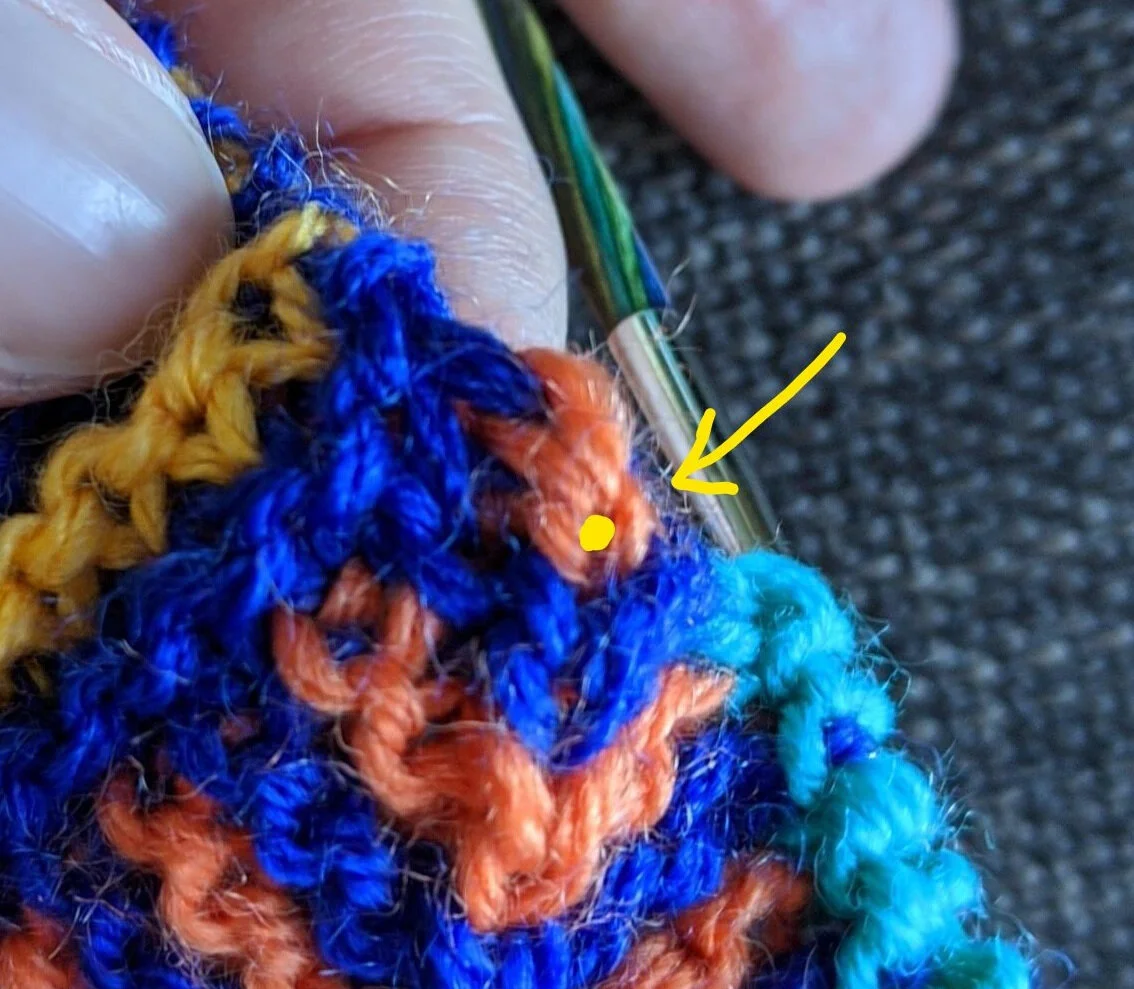
At the CDD stitch, you’ve likely used that final stitch as the first stitch for your next square, so the center spine is sort of pulled up and around. To avoid a curvy blip in the line of spine stitches, be sure to pick up the LOWER of the last 2 CDD stitches. And by this I mean, knit into the center of it, as if it were a knit stitch still on the needles.
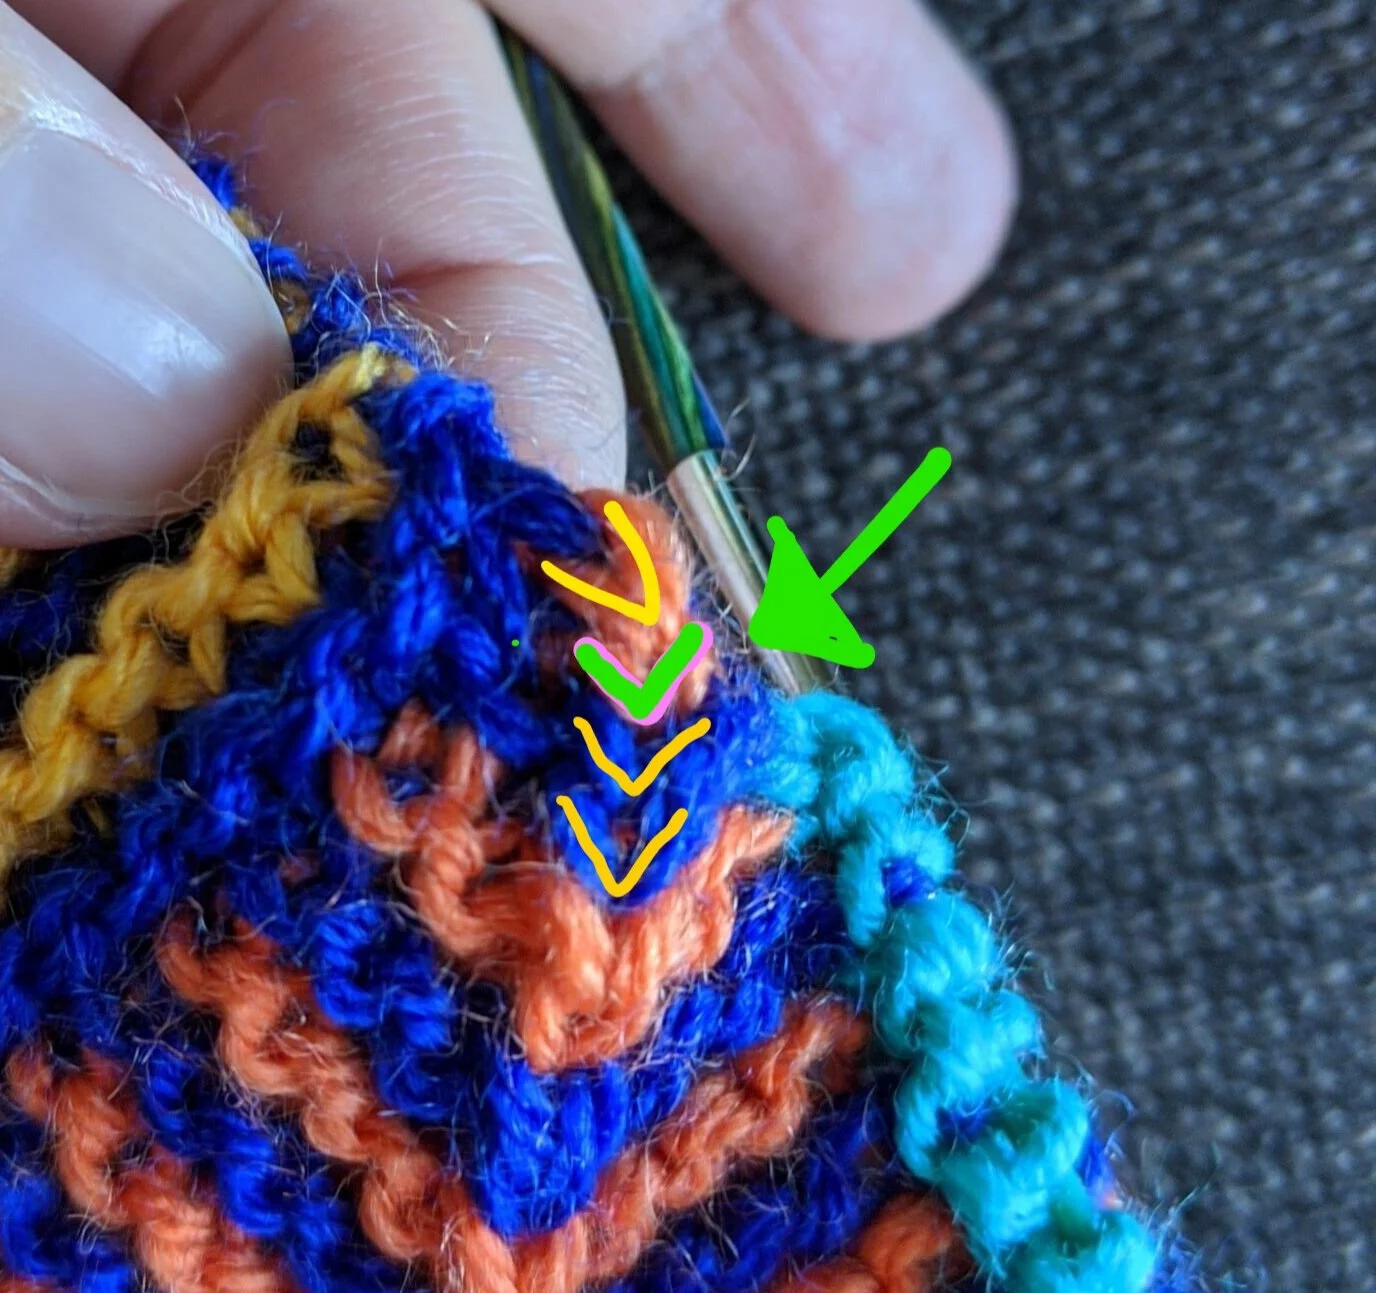
A close-up of where to insert your needle when picking up this stitch:
Here’s what it looks like when everything is all nice and neatly picked up! You can see that it looks like the turquoise stitch grows out of the CDD used in the pickup. (You can also see a little bit of the final red stitch that was ignored peeking out from behind the turquoise stitch)


For completeness, here’s a picture of a square I added where I picked up the last of the purple stitches, rather than the second-to-last, and it looks a little wonky. The last purple and the first turquoise both seem to slant awkwardly to the left, and the line of CDDs has a little zig. Ultimately it’s not a HUGE deal to me, but I feel like part of the delight of making things by hand is paying attention to the tiny details like this!